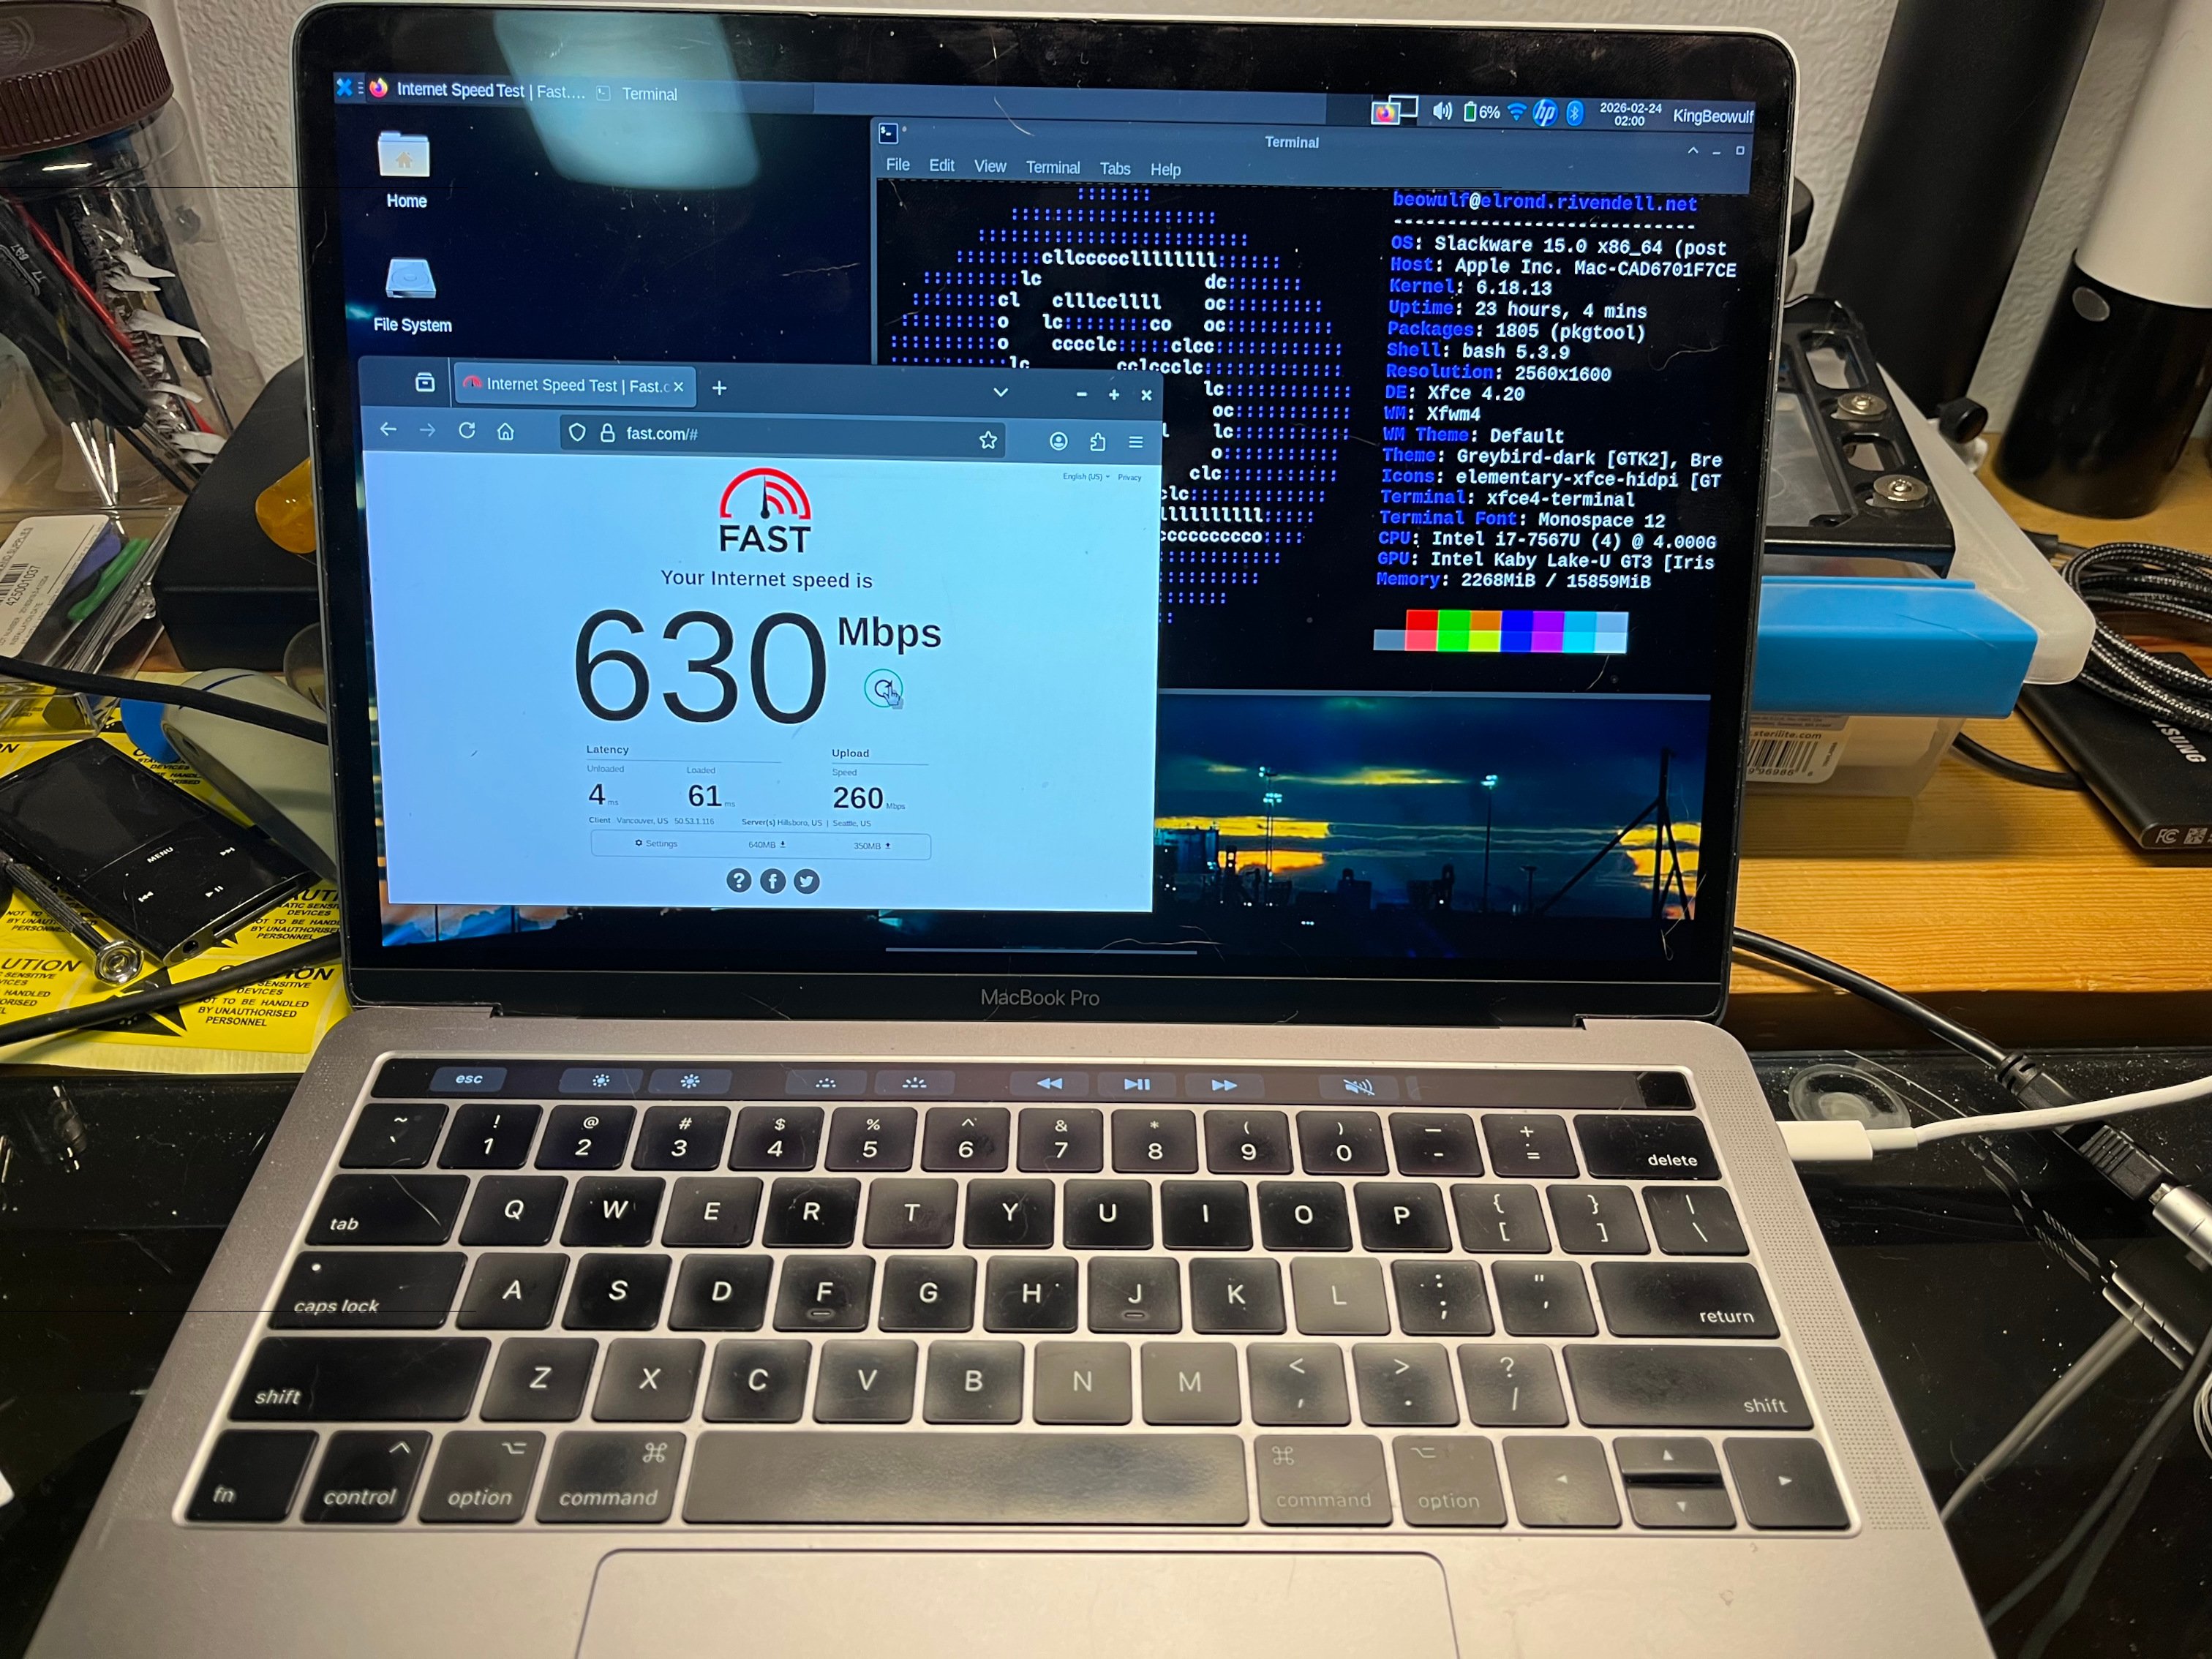
Macbook Pro 2017 14,2 with Slackware64
Posted on Feb 23, 2026 by kingbeowulf
After the success of getting the old 2007 iMac running, I decided to take a stab at a used Intel Macbook. Many of these are being obsoleted as MacOS for Intel systems reaches end of life / end of support. For most basic office productivity tasks, a 5-10 yr old system is plenty good enough.
fter perusing the used computers marke places, I settled on an old Macbook Pro mid-2017 14,2
Specifications:
 13.3-inch (diagonal) LED IPS display
 22560x1600 retina display 227 ppi
 3i7-7567U CPU @ 3.50GHz
 41TB NVMe SSD
 516GB RAM
 6Intel Iris Plus Graphics 650
 7Four Thunderbolt 3 (USB-C) ports
 8802.11ac Wi-Fi
 9Bluetooth 4.2
10720p FaceTime HD camera
The Macbook needed some repair: a few new key caps to replace worn/broken, and a new battery. I split the drive into 2 partitions, leaving MacOS intact for now as a backup in case the Linux installation failed.
In MacOS, first use Disk Utility to resize and the create new empty space (or not - you can always just go for it!), shrinking the MacOS partition as needed to create space for the linux partitions. Now, boot the Slackware installer as usual: hold "option" key to get the icon for the USB drive (generic EFI icon next). When booting, chose 'nomodeset' to avoid console resolution issues (discussed below), use cfdisk to setup new root partition to Linux, and add a swap partition (needed for suspend/hibernate, more on that later). Leave Apple's EFI partition as-is. I opted for the current development branch of Slackware since this will have the latest hardware support. After performing the recommended full install procedure, skipping the lilo/elilo installation section. Lilo won't work on a Mac, and elilo will usually brick the Apple's implementation of UEFI. Finish up, but do not reboot yet. If all goes well you will have:
 1fdisk -l /dev/nvme0n1
 2Disk /dev/nvme0n1: 931.84 GiB, 1000555581440 bytes, 244276265 sectors
 3Disk model: APPLE SSD AP1024J
 4Units: sectors of 1 * 4096 = 4096 bytes
 5Sector size (logical/physical): 4096 bytes / 4096 bytes
 6I/O size (minimum/optimal): 4096 bytes / 4096 bytes
 7Disklabel type: gpt
 8Disk identifier: A0F3C2CE-A16F-499D-B696-28CB893710C6
 9
10Device             Start       End   Sectors   Size Type
11/dev/nvme0n1p1         6     76805     76800   300M EFI System
12/dev/nvme0n1p2     76806 122176532 122099727 465.8G Apple APFS
13/dev/nvme0n1p3 122176768 239879423 117702656   449G Linux filesystem
14/dev/nvme0n1p4 239879424 244276223   4396800  16.8G Linux swap
Since we can't use lilo or elilo, we will now set up grub2 since this is already installed and available. At this point, the root partition should still be mounted on /mnt so we will chroot:
1mount /dev/nvme0n1p1 /mnt/boot/efi
2mount -o bind /dev /mnt/dev
3mount -o bind /proc /mnt/proc
4mount -o bind /sys  /mnt/sys
5mount -o bind /sys/firmware/efi/efivars /mnt/sys/firmware/efi/efivars
This last one exposes the efi vars grub needs to access for the boot loader configuration.
1chroot /mnt
We are now running our new Slackware! To install grub2, using the kernel and initrd already set up during the install process,
1grub-install --target=x86_64-efi --efi-directory=/boot/efi/ --bootloader-id=slackware
2grub-mkconfig -o /boot/grub/grub.cfg
If all goes well you should see
 1tree /boot/efi
 2boot/efi
 3└── EFI
 4    ├── APPLE
 5    │   ├── EMBEDDEDOS
 6    │   │   ├── FDRData
 7    │   │   ├── combined.memboot
 8    │   │   └── version.plist
 9    │   └── LOG
10    └── slackware
11        └── grubx64.efi
We need to make one "small" update. Apple won't see the grub efi file unless you move and rename grubx64.efi. You can save a step by specifying '--bootloader-id=boot'. I decided to manually copy install so as to have a reminder.
 1mkdir -p /boot/efi/EFI/boot
 2cp /boot/efi/EFI/slackware/grubx64.efi /boot/efi/EFI/boot/BOOTX64.efi
 3
 4tree /boot/efi
 5boot/efi
 6└── EFI
 7    ├── APPLE
 8    │   ├── EMBEDDEDOS
 9    │   │   ├── FDRData
10    │   │   ├── combined.memboot
11    │   │   └── version.plist
12    │   └── LOG
13    ├── boot
14    │   └── BOOTX64.EFI
15    └── slackware
16        └── grubx64.efi
If you forget to copy the efi file, you can boot back into MacOS, open the terminal:
1% diskutil list                     # to find EFI partition
2% sudo diskutil mount disk0s1       # mount the EFI partition
3% mkdir -p /Volumes/EFI/EFI/boot
4% cp /volumes/EFI/EFI/slackware/grubx64.efi /volumes/EFI/EFI/boot/BOOTX64.EFI
Before we can reboot, we need one more edit. When linux boots it "guesses" the incorrect Retina Display resolution for the console framebuffer. This results in the ~5-10 lines on the bottom of the screen being outside the display area. I was not sure how to fix this via grub, or if it would stick on updates, so I opted with just adding a simple fix to /etc/rc.d/rc.local:
1fbset -xres 2560 -yres 1600
This will make is easy to log in and run startx. You can also just configure runlevel 4 as well since X figures out the correct screen size.
At this point you can exit the chroot and reboot. Now when you hold down the 'option' key on boot up, your should see the Apple Mac icon and the generic EFI icon. The latter will boot Slackware via grub. The Macbook will remember this choice for the next reboot.
Congratulations! You are now running Slackware on the Macbook!
At this point, most everything works using the December 2025 - Jan 2026 Slackware current except for a few items, even, amazingly, bluetooth. I was able to tether my iPhone via bluetooth for network access. I had posted on Linuxquestions.org a few months back to adjust the kernel configuration for the APPLESPI modules (CONFIG_KEYBOARD_APPLESPI is not set) thus eliminating the need to have an external keyboard during installation. Three final items needed some work: WIFI, touchbar, and audio/sound. None of these worked at all after installation.
Also, I highly recommend using kernel 6.18.x from /testing as this newer kernel seems to be a bit more operational that the install default 6.12.x or 6.14.x also in /testing.
WIFI
Ah, the bane of open source: Broadcom wireless chipsets
Network controller: Broadcom Inc. and subsidiaries BCM43602 802.11ac Wireless LAN SoC (rev 02)
1lsmod |grep brcm
2brcmfmac_wcc           12288  0
3brcmfmac              516096  1 brcmfmac_wcc
4brcmutil               16384  1 brcmfmac
5cfg80211             1400832  1 brcmfmac
6mmc_core              258048  1 brcmfmac
While I had checked for basic support, I had overlooked a weird quirk. While the modules and firmware were available, this chipset required a configuration text file for proper operation.
/lib/firmware/brcm/brcmfmac43602.txt
For some reason, Broadcom doesn't distribute this file. You can find the one I use in Shell Scripts and Utilities.
The file linked above is the latest iteration and works well - at least so far! Otherwise, you could sometimes scan and see the access point SSID but could not connect. The whole story is here.
Edit the provided configuration file to use to your specific MAC address. The rest should already be set up.
macaddr= <enter your actual brcm MAC address here>
If you think its weird to require the MAC address, same here. The other settings allow full power, all channels and both 2.4/5 GHz. Next, add the following to /etc/modprobe.conf/brcmfmac.conf to stabilize connections and reduce drops:
1options brcmfmac feature_disable=0x82000 # disables WPA SAE option, auth offload and fast roaming (?)
2options brcmfmac feature_disable=0x2000  # disable reduce CPU load option
Lastly, if using, NetworkManager, turn off power management. Create the file /etc/NetworkManager/conf.d/default-wifi-powersave.conf with the contents
1[connection]
2wifi.powersave = 2
Reboot and wifi should work. It is still a bit cranky sometimes but seems to better now with kernel 6.18.x.
TOUCHBAR
For those MacBook models with the touchbar ribbon, hunting down the driver module updates was an adventure. While keyboard and trackbad drivers are now part of the kernel, and touchbar support for newer T2 based Macbooks is drifting into the kernel, for T1 Macbooks, it doesn't look like mainline support will be added anytime soon. Apple has also dropped the touchbar from new Macbooks. You can skip the touchbar, but then you won't have ESC, Fn keys, multimedia keys, etc.
When I started this adventure a year ago, Slackware current was using an older kernel in mainline (now 6.12.x), and a newer one in /testing (now 6.18.x). For either kernel series, you will need the updated macbook12-spi-driver. First, downloaded and install dkms. For kernels before 6.14:
1git clone https://github.com/marc-git/macbook12-spi-driver.git /usr/src/applespi-0.1
2cd /usr/src/applespi-0.1
3dkms install -m applespi -v 0.1
For kernels before 6.14 and newer (or at least 6.18.13 as of this post), you will need an updated fork:
1git clone https://github.com/pedroresende/macbook12-spi-driver /usr/src/applespi-0.1
2cd /usr/src/applespi-0.1
3dkms install -m applespi -v 0.1
The new modules will be installed in /lib/modules/6.x.y/. You will need to run dkms command again manually on kernel upgrades if you do not enable automatic kernel rebuilding. The power button/finger scanner will work only as a power button. Biometrics support is not implemented.
You now have basic touchbar functions if not as fancy or colorful as with MacOS.
AUDIO
The Linux kernel does have Macbook audio support out-of-the-box, maybe. However, Apple tends to make "changes" the audio chipset so that the generic modules do not work. Fortunately, we found a fix to the kernel driver for sound on Macs with Cirrus 8409 HDA chips:
https://github.com/davidjo/snd_hda_macbookpro
This project has a handy script, for those "other" linux distros, to handle patching the kernel source. It will download the kernel source for the running kernel, patch the cirrus driver, and compile and install the new kernel module. The script checks for various "other" distros for the kernel headers, and will exit since Slackware isn't "detected" - as in not even considered. Yes, lots of quotations so I can voice my displeasure without starting a flame war. Fortunately a simple edit fixes this oversight.
To start, grab the repo and put it somewhere (I use $HOME/Builds/audio/ from my normal user):
1git clone https://github.com/davidjo/snd_hda_macbookpro.git
2cd snd_hda_macbookpro/
You will need to edit the installation script to bypass the header check, for example,
1nano install.cirrus.driver.sh
or use your favorite editor. Simply add a check for Slackware so that the script skips all the other distro logic. Here is the patch file for the changes:
 1--- install.cirrus.driver.orig.sh	2026-02-22 22:12:35.843012155 -0800
 2+++ install.cirrus.driver.sh	2026-02-23 02:51:17.846984261 -0800
 3@@ -86,6 +86,7 @@
 4 isfedora=0
 5 isarch=0
 6 isvoid=0
 7+isslack=0
 8
 9 if [ -d /usr/src/linux-headers-${UNAME} ]; then
10 	# Debian Based Distro
11@@ -103,6 +104,10 @@
12 	# Void Linux
13 	isvoid=1
14 	:
15+elif [ -d /usr/include ]; then
16+       # Slackware Linux
17+       isslack=1
18+       :
19 else
20 	echo "linux kernel headers not found:"
21 	echo "Debian (eg Ubuntu): /usr/src/linux-headers-${UNAME}"
I was too lazy to customize this script any further, and leave that task as an exercise for the reader. As root, run the script to generate the new module. If already generated the touchbar modules, you should already have dkms installed. Reboot to load the new module. Sometimes, for sound to initialize, you may need to fully power off the Macbook.
Currently, the left speaker is about 1/2 volume of the right speaker. The headphone jack works and audio is balanced. The speakers work properly in MacOS (dual boot), so I suspect something is still a bit off with the audio drivers.
This Macbook Pro has 4 USB-C ports. The 2 on the left are Thunderbolt 3; the 2 on the right are USB3. Any port can be used to charge. I've run into a few glitches where devices aren't fully detected when plugged in, but with a reboot all is well. Also some devices work on either side, some only on the USB3 side. Curiously, I have 2 USB-C hubs with USB-A, C, HDMI and sdcard ports. Both work, but one only reports as USB 2.0. This same hub reports as USB 3 when plugged into a USB-C port port on my AMD Ryzen desktop box. Go figure.
To avoid rebooting, you can try at reset the USB hub or device. On this Macbook, we see via lsusb and lspci
 1# lsusb
 2Bus 001 Device 001: ID 1d6b:0002 Linux Foundation 2.0 root hub
 3Bus 001 Device 002: ID 05ac:8600 Apple, Inc. iBridge
 4Bus 002 Device 001: ID 1d6b:0003 Linux Foundation 3.0 root hub
 5Bus 003 Device 001: ID 1d6b:0002 Linux Foundation 2.0 root hub
 6Bus 004 Device 001: ID 1d6b:0003 Linux Foundation 3.0 root hub
 7Bus 005 Device 001: ID 1d6b:0002 Linux Foundation 2.0 root hub
 8Bus 006 Device 001: ID 1d6b:0003 Linux Foundation 3.0 root hub
 9
10# lspci -D |grep "USB controller"
110000:00:14.0 USB controller: Intel Corporation Sunrise Point-LP USB 3.0 xHCI Controller (rev 21)
120000:06:00.0 USB controller: Intel Corporation JHL6540 Thunderbolt 3 USB Controller (C step) [Alpine Ridge 4C 2016] (rev 02)
130000:7c:00.0 USB controller: Intel Corporation JHL6540 Thunderbolt 3 USB Controller (C step) [Alpine Ridge 4C 2016] (rev 02)
You can try resetting a root hub via sysfs as root, for example, to reset iBridge,
 1echo "1-2" > /sys/bus/usb/drivers/usb/unbind
 2echo "1-2" > /sys/bus/usb/drivers/usb/bind
 3
 4or
 5
 6usb_modeswitch -v 0x 05ac -p 0x8600 --reset-usb
 7
 8or
 9
10usbreset 05ac:8600
Alternatively, you can also try to reset the entire USB controller. Note: Each Thunderbolt port appears to be on its own controller.
1echo 0000:00:14.0 > /sys/bus/pci/drivers/xhci_hcd/unbind
2echo 0000:00:14.0 > /sys/bus/pci/drivers/xhci_hcd/bind
3
4echo 0000:06:00.0> /sys/bus/pci/drivers/thunderbolt/unbind
5echo 0000:06:00.0 > /sys/bus/pci/drivers/thunderbolt/bind
6
7echo 0000:7c:00.0 > /sys/bus/pci/drivers/thunderbolt/unbind
8echo 0000:7c:00.0  > /sys/bus/pci/drivers/thunderbolt/bind
The HiDPI retina display will need some scaling adjustments so that the icons and test for KDE/Plasma or Xfce aren't tiny scribbles. This is easily done in the appropriate settings applet. However, if you use Xfce, but still use the occassional KDE program, as I do, the KDE program will not see the correct scaling factor, even if you previously set it in KDE. To fix this, add to your user's .bash_profile similar
1export QT_AUTO_SCREEN_SCALE_FACTOR=2
2export QT_ENABLE_HIGHDPI_SCALING=2
3export QT_SCALE_FACTOR=2
https://forum.xfce.org/viewtopic.php?id=16870
Do not add this globally as it can confuse/override KDE settings.
This was quite the adventure getting everything to work. If you can pick up an Intel Macbook for cheap, it will make a good spare or backup laptop. I use it for general tasks (web, email), as well as streaming our linux user group meetings to Twitch with a GoPro Hero 13 and OBS Studio.
- Related Topics:
- slackware64
- macbook
Error exporting original video capture in Steam Client
Posted on Oct 13, 2025 by kingbeowulf
A while ago, Valve added a built-in system for creating and sharing your game play footage in the Steam Client. This makes it easy to record game videos "on the fly" and easily share clips without having to learn OBS Studio and video editing software. Game recording works quite well and was even ported to the Steam for Linux Client.
There is one glitch, however. On Linux, with a AMD GPU, and sometimes with an Nvidia GPU, trying to export a video or video clip from the 'Original' tab results in the error:
"Failed to export, try again"
Not very helpful. This occurs when trying to export in H.265 format - the default format Steam uses to record the video. Turns out this was reported a while back:
https://github.com/ValveSoftware/steam-for-linux/issues/11850
Steam lis looking for libcuda.so.1, even when running on a non-Nvidia GPU. You can export with transcoding to H.264 in the 'Custom' tab just fine. This works fine (you may need to install ffmpeg and the relevant codecs for your linux distro).
I found a workaround in a small blog post:
https://y.tsutsumi.io/reading-steam-game-recordings
To copy the original H.265 stream, look in you Steam directory:
.local/share/Steam/userdata/{id}/gamerecordings/clips
You will see one or more directories of the format:
clip_{game id}_{date_time in UTC}
Locate your game and open the directory. The original vidoe is the in
video/fg_{game id}_{date_time in UTC}
where you with find the video stream *.m4s files as well as the important session.mpd' XML file. Ffmpeg can read mpd file natively, so simply
ffmpeg -i session.mpd -c copy out.mp4
Other container formats compatible with H.265 and AAC audio will work as well. You now have the full original video to copy, upload, modify etc.
Have Fun!
GoPro Hero 13 webcam via Linux USB networking
Posted on Jul 09, 2025 by kingbeowulf
A few months ago I picked up a GoPro Hero 13 cheap as another gadget to play with just for fun. You can review the specification details here. It's a decent enough portable camera for outdoors in the bright lights. Indoors...well not so much. You can read reviews elsewhere; just be a bit skeptical when the reviewer gushes about this camera's capabilities. It has some odd limitations.
For one, webcam mode is limited to 1080p 30fps. Also, you can't save a 4K copy on the sd card while in webcam mode. Nuts.
But this is not a review of the GoPro Hero 13.
I was interested in getting the GoPro to talk to my Linux based computers (Slackware, of course), without having to go through any of GoPro's bespoke apps. The first step to to simply plug in the USB-C cable. Linus recognizes the camera as a MTP device. You can easily upload and download files stored on the sd card.
 1Jul  8 21:24:47 gandalf kernel: usb 6-4: new SuperSpeed USB device number 3 using xhci_hcd
 2Jul  8 21:24:47 gandalf kernel: usb 6-4: New USB device found, idVendor=2672, idProduct=0059, bcdDevice= 0.01
 3Jul  8 21:24:47 gandalf kernel: usb 6-4: New USB device strings: Mfr=1, Product=2, SerialNumber=3
 4Jul  8 21:24:47 gandalf kernel: usb 6-4: Product: HERO13 Black
 5Jul  8 21:24:47 gandalf kernel: usb 6-4: Manufacturer: GoPro
 6Jul  8 21:24:47 gandalf kernel: usb 6-4: SerialNumber: C3534250002548
 7Jul  8 21:24:47 gandalf kernel: cdc_ncm 6-4:1.0: MAC-Address: 04:57:47:3c:c2:c4
 8Jul  8 21:24:47 gandalf kernel: cdc_ncm 6-4:1.0 eth1: register 'cdc_ncm' at usb-0000:0e:00.3-4, CDC NCM, 04:57:47:3c:c2:c4
 9Jul  8 21:24:47 gandalf mtp-probe: checking bus 6, device 3: "/sys/devices/pci0000:00/0000:00:08.1/0000:0e:00.3/usb6/6-4"
10Jul  8 21:24:47 gandalf mtp-probe: bus: 6, device: 3 was an MTP device
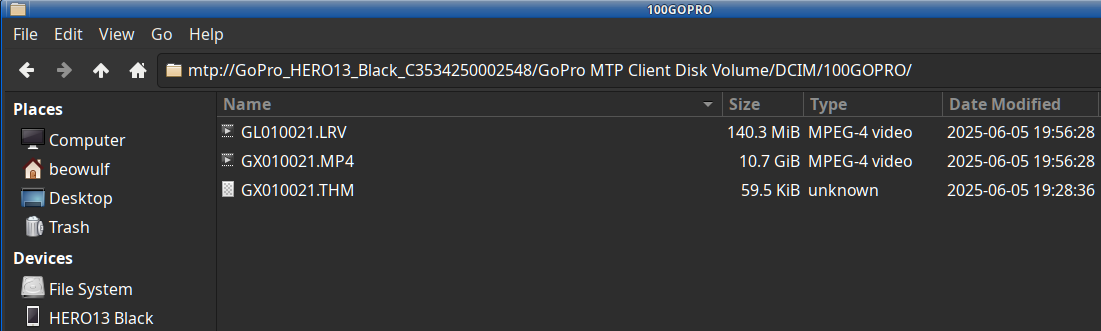
Each video is stored as 3 files: low resolution video (LRV), high resolution video (MP4), and a thumbnail image (THM). You can even update the firmware manually by uploading it directly to the sd card if you don't like to update OTA via the phone Quik app.
By the way, the official Quik app is now the only official way to access and use the camera. All Windows or MacOS programs are deprecated. Gopro decided that editing and streaming is only for mobile devices. Sure you can operate the camera from the app, stream to Twitch, etc, but you got to do so on your phone, and you better have a fast and solid WIFI connection.
Nuts...but this is not a review.
Fortunately, GoPro has released the entire API to access the camera features programmatically. Unfortunately, access is via a web API. You can find the full API specification as well as tutorials and software examples on the Open GoPro Github repository. There are numerous examples and how-tos on the internet, especially written in Python, but, as I will show you below, some are needlessly complicated, or haven't been updated for the Hero 13 and newer firmware.
For the sake of this "proof of concept" discussion, I'll skip access via BLE and WIFI and concentrate on the USB connection. It turns out that the USB-C port does support standard ethernet TCP/IP networking. Once you plug the USB-C cable in and turn on the camera, a new wired network device will appear. With Network Manager this is automatic; if you are running Slackware without Network Manager, then simply restart the network:
 1# /etc/rc.d/rc.inet1 restart
 2Stopping the network interfaces...
 3Starting the network interfaces...
 4eth0: polling for DHCP server
 5dhcpcd-9.5.2 starting
 6DUID 00:04:03:c0:02:18:04:4d:05:03:e3:06:b2:07:00:08:00:09
 7eth0: waiting for carrier
 8eth0: carrier acquired
 9eth0: IAID 4d:03:e3:b2
10eth0: adding address fe80::6cdf:843e:d95b:905c
11eth0: soliciting a DHCP lease
12eth0: soliciting an IPv6 router
13eth0: offered 192.168.1.3 from 192.168.1.1
14eth0: probing address 192.168.1.3/24
15eth0: Router Advertisement from fe80::c641:1eff:fe33:cc23
16eth0: soliciting a DHCPv6 lease
17eth0: DHCPv6 REPLY: No Addresses Available
18eth0: DHCPv6 REPLY: No Addresses Available
19eth0: DHCPv6 REPLY: No Addresses Available
20eth0: leased 192.168.1.3 for infinity
21eth0: adding route to 192.168.1.0/24
22eth0: adding default route via 192.168.1.1
23forked to background, child pid 662
24eth1: polling for DHCP server
25dhcpcd-9.5.2 starting
26DUID 00:04:03:c0:02:18:04:4d:05:03:e3:06:b2:07:00:08:00:09
27eth1: waiting for carrier
28eth1: carrier acquired
29eth1: IAID 47:3c:c2:c4
30eth1: soliciting a DHCP lease
31eth1: offered 172.25.148.54 from 172.25.148.51
32eth1: probing address 172.25.148.54/24
33eth1: leased 172.25.148.54 for 864000 seconds
34eth1: adding route to 172.25.148.0/24
35forked to background, child pid 803
In this example, we have a new device (eth1) and IP address. The camera runs its own DHCP server so that your computer is now 172.2X.1YZ.54 and the camera IP is fixed at 172.2X.1YZ.51. Each camera has a unique IP address. The values XYZ are the last three digits of the camera's serial number. In my case, I will send and receive data from address
http://172.25.148.54:8080
Nice. Now it gets complicated.
Now that we have access, we can start controlling the camera. Following the examples, we can send and receive camera information via an HTTP or curl GET request. For example, to get the camera information via the CLI with curl:
 1$ curl --request GET  --url http://172.25.148.51:8080/gopro/camera/info
 2
 3{
 4    "model_number": "65",
 5    "model_name": "HERO13 Black",
 6    "firmware_version": "H24.01.02.02.00",
 7    "serial_number": "C3534250002548",
 8    "ap_mac_addr": "0657473cc2c5",
 9    "ap_ssid": "Diablo00"
10}
All the camera settings and function can be accessed in this way, including some settings not exposed to the camera settings UI.
So how do we extract a video stream over USB ethernet to use the camera as a webcam? This can get a bit tricky, if you want to use the GoPro camera in most webcam apps, since the software will be expecting the video over V4L2 and /dev/video0 (for example, a standard USB webcam). At this point, the camera behaves like a standard IP camera. To get the video routed to regular webcam apps, you will need to set up a V4L2 loopback device to simulate a USB webcam.
I'll leave that as an exercise for the reader. We will use the IP video stream directly.
Via the web API, we can send the GoPro camera video directly to applications such as OBS Studio, VLC, etc, or process the video directly with ffmpeg.
NOTE: You may need to install a few extra video codecs if these are not automatically included in your Linux distro. For example, you will need at least the codecs for H.264 and aac since this is the video format that the camera transmits.
In my case, I've added aac, x264, x265 and recompiled ffmpeg, VLC, and OBS.
Remember that I mentioned a few "odd limitations"? Streaming video over USB, and setting webcam mode limits the video to 1920x1080 30 fps and h.264 and all the most settings are unavailable. Why? Go ask GoPro.
Enough preamble. It's time to whip the llama's ass!
Once you now the HTTP get commands to use, the next step is find the stream URL. There are 2 ways. You can start a preview stream. This is the same stream as the preview on the Quik app. This stream comes to use as UDP on port 8554 (default). We'll use ffplay, from ffmpeg, to test.
1$ curl --request GET --url http://172.25.148.51:8080/gopro/camera/stream/start[?port=xxxx]
2{}
3$ ffplay udp://172.25.148.51:8554
4...
5 Stream #0:0[0x1011]: Video: hevc (Main) ([36][0][0][0] / 0x0024), yuvj420p(pc, bt709), 1920x1080 [SAR 1:1 DAR 16:9], 29.97 fps, 29.97 tbr, 90k tbn, 29.97 tbc
6  Stream #0:1[0x1100]: Audio: aac (LC) ([15][0][0][0] / 0x000F), 48000 Hz, stereo, fltp, 191 kb/s
7...
8$ curl --request GET --url http://172.25.148.51:8080/gopro/camera/stream/stop
9{}
The webcam mode can also stream via RTSP, and this can be handy if you want to grab the stream with several programs. Here is a basic work flow to start webcam mode, start the stream, view, and exit webcam mode. Resolution is set to 1920x1080, Linear aspect ratio, protocol RTSP and port 554:
1$ curl --request GET --url http://172.25.148.51:8080/gopro/webcam/start?res=12&fov=4&port=554&protocol=RTSP
2$ ffplay rtsp://172.25.148.51:554/live
3...
4$ curl --request GET --url http://172.25.148.51:8080/gopro/webcam/exit
Here is a simple bash script that puts all these concepts together.
 1#!/bin/bash
 2
 3# configure GoPro for USB network access as webcam
 4# Assume network manager is running to assign USB network interface
 5# For DHCP on Slackware without nm run '/etc/rc.d/rc.inet1 restart as root user
 6
 7# IP based on GoPro serial number and internal DHCP.
 8# (see API specification https://gopro.github.io/OpenGoPro/
 9
10# The socket address for USB connections is 172.2X.1YZ.51:8080
11# where XYZ are the last three digits of the camera's serial number
12# USB interface will be 172.25.148.54 and GoPro is x.x.x.51"
13
14# TO-DO: parse network information to determine IP address
15# TO-DO: select file path?
16
17GOIP="172.25.148.51"
18PORT="8080"
19
20# base command
21CURLCMD="curl --request GET --url http://${GOIP}:${PORT}/gopro/webcam"
22CURLUDP="curl --request GET --url http://${GOIP}:${PORT}/gopro/camera/stream"
23
24# Webcam commands
25#  res=12 : 1080
26#  fov=4  : linear
27#  port=554 : stream port
28#  protocol=RTSP : stream
29#
30# for UDP the default port is 8554
31
32WCSTART="start?res=12&fov=4&port=554&protocol=RTSP"
33
34case $1 in
35    preview)
36        echo "Entering webcam preview:"
37        ${CURLCMD}/preview
38        echo "Starting 1280x720 preview..."
39        exec ffplay udp://${GOIP}:8554 > /dev/null 2>&1 &
40        sleep 8
41    ;;
42    stream)
43        echo "Starting stream: rtsp://${GOIP}:554/live"
44        echo ${CURLCMD}/${WCSTART}
45        ${CURLCMD}/${WCSTART}
46    ;;
47    record)
48        stmp=$(date +"%m-%d-%Y_%H%M" )
49        echo "** Saving copy of video stream to 'gopro-${stmp}.mkv' (press 'q' to stop)."
50# Audio skipped since OBS will record an external microphone
51		if [ "$2" = "UDP" ]; then
52			ffmpeg -hide_banner -y -i udp://${GOIP}:8554 -c:v copy -an gopro-${stmp}.mkv
53		else
54			ffmpeg -hide_banner -y -rtsp_transport tcp -i rtsp://${GOIP}:554/live -c:v copy -an gopro-${stmp}.mkv
55		fi
56    ;;
57    stop)
58	echo "Stopping stream:"
59        ${CURLCMD}/stop
60    ;;
61    exit)
62        echo "Exit webcam mode:"
63        ${CURLCMD}/exit
64    ;;
65    ustart)
66    	echo "Starting 1920x1080 stream on udp://${GOIP}:8554 "
67    	${CURLUDP}/start
68    ;;
69    ustop)
70    	echo "Stopping upd stream"
71    	${CURLUDP}/stop
72    ;;
73    *)
74        echo "usage: ${0} preview|stream|record [RTSP|UDP]|stop|exit|ustart|ustop"
75        echo "preview = puts GoPro into webcam preview mode"
76        echo "stream = starts RTSP webcam stream"
77        echo "record = records raw RTSP (default) or UDP webcam stream"
78        echo "stop = end webcam stream"
79        echo "exit = exit webcam mode"
80        echo "ustart = starts UDP preview stream"
81        echo "ustop = stops UDP preview stream"
82     ;;
83esac
To use OBS, we first start webcam mode. We'll use RTSP for this example, but UDP works as well. If you are going to stream to Twitch, webcam mode is already H.264.
1$ curl --request GET --url "http://172.25.148.51:8080/gopro/webcam/start?res=12&fov=4&port=554&protocol=RTSP"
2{
3	"status": 2,
4	"error": 0
5}
We'll now need to set up OBS to to look at "rtsp://172.25.148.51:554/live". Add the Gopro Media Source to your scene and set the parameters:

If for some reason, the Media Source option is cranky, and you have VLC installed, you can instead create a new VLC Media Source:
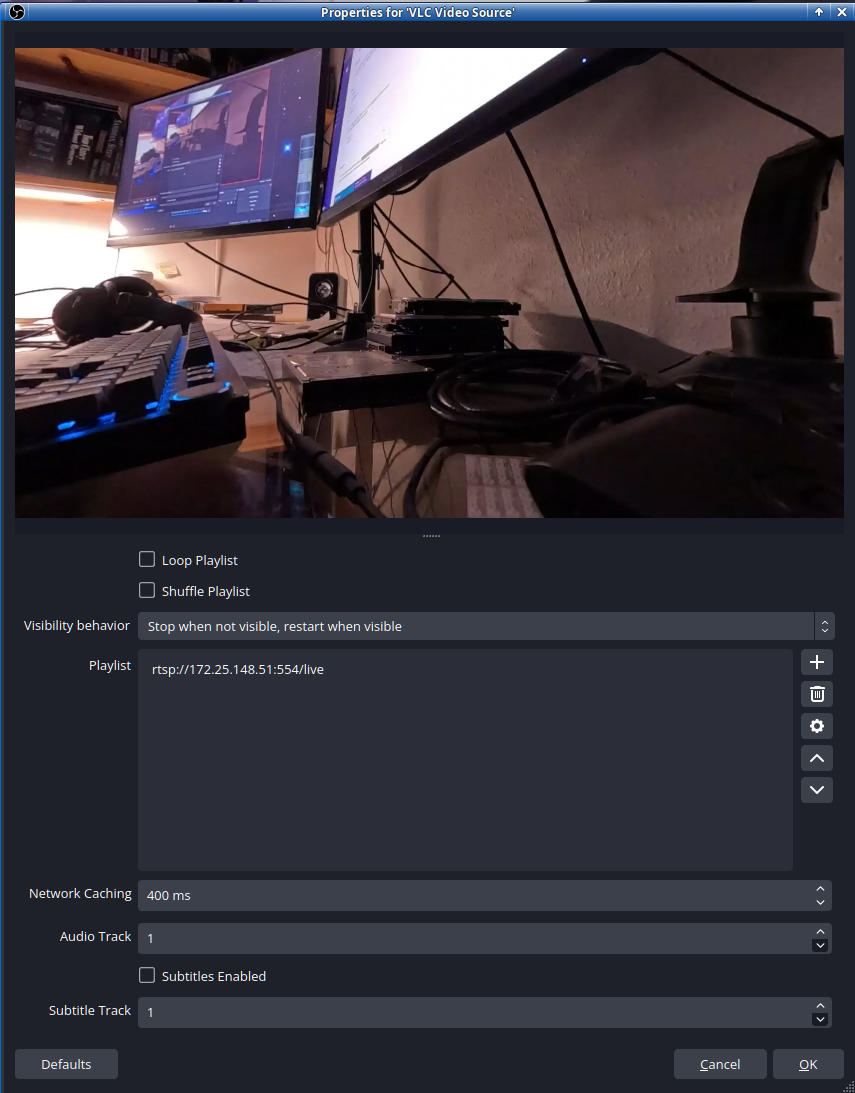
Complete the OBS configuration as you require for your streaming pleasure. Webcam mode, if I am not mistaken, has a bitrate of ~2500-3000 Kbps, so keep this in mind when setting up your encoding parameters. If you set OBS to record the stream, be careful with the settings and the capabilities of your computer. Running both streaming and recording processes can overwhelm older CPUs and GPUs.
Although the HTTP API to control the GoPro camera seems a bit convoluted and overly complex to me, it does work well enough to operate the camera as a webcam. I guess this old timer is just not hip to all this web API nonsense. I just wish they would allow
- Higher resolutions, fps, and bitrates in webcam mode.
- Allow access to all the fancy image settings in webcam mode.
- Easier, direct access to WIFI without having to use BLE to enable it.
- Have both the USB and WIFI not use fixed IP addresses via the built-in DHCP server and use just a DHCP client. The camera should connect to your network as just another network device or computer.
Have fun!
ProtonVPN via OpenVPN
Posted on Mar 22, 2025 by kingbeowulf
Proton provides and officially recommends graphical desktop utility to access their VPN services. Unfortunately, these are supported on just a few "official" Linux distributions. Proton deprecated their bash command line (CLI) version. There is a community CLI version available, written in python, but both of these will be defunct after Proton upgrades their openvpn infrastructure on 31 March 2025.
Therefore, instead of trying get there official client to work (why no offline installer, or simple tar.gz etc archive?), we created our own simple, manual bash script targeting the freely available VPN servers. Thanks goes to a fellowPortland Linux User Group member for script improvements, suggestions and testing.
Proton provides instructions to manually configure both openvpn and wireguard for VPN access. This article will focus on openvpn.
Prerequisits
For this example, since for my Linux configuration, I will need to log in as 'root' user, I created directories under /root for the required files.
Log into your Proton account and download the .ovpn configurations. Also copy the openvpn user name and password you will require into a file, one per line, to 'protonvpn_auth.txt'.
Next, download the 'update-resolv-conf' script, copy to /etc/openvpn and set it to executable. This script will update your /etc/resolv.conf for the vpn tunnel.
If not already done, make sure that the lines
1script-security 2
2up /etc/openvpn/update-resolv-conf
3down /etc/openvpn/update-resolv-conf
are placed in the .ovpn files so that this resolv script will be executed. Your /root folder should now contain the following tree, for example:
 1network
 2├── protonvpn
 3│   ├── jp-free-1.protonvpn.udp.ovpn
 4│   ├── jp-free-16.protonvpn.udp.ovpn
 5│   ├── jp-free-2.protonvpn.udp.ovpn
 6│   ├── jp-free-4.protonvpn.udp.ovpn
 7│   ├── jp-free-5.protonvpn.udp.ovpn
 8│   ├── nl-free-1.protonvpn.udp.ovpn
 9│   ├── nl-free-12.protonvpn.udp.ovpn
10│   ├── nl-free-2.protonvpn.udp.ovpn
11│   ├── nl-free-90.protonvpn.udp.ovpn
12│   ├── protonvpn_auth.txt
13│   ├── us-free-1.protonvpn.udp.ovpn
14│   ├── us-free-2.protonvpn.udp.ovpn
15│   ├── us-free-3.protonvpn.udp.ovpn
16│   ├── us-free-4.protonvpn.udp.ovpn
17│   └── us-free-5.protonvpn.udp.ovpn
18├── protonvpn.sh
I've placed a copy of the script in the files section. It's functional but still a bit of a work in progress.
protonvpn.sh
 1#!/usr/bin/bash
 2
 3set -e
 4
 5RED="\033[0;31m"
 6GREEN="\033[0;32m"
 7NC='\033[0m' # No Color
 8
 9VPN_PATH="/root/network/protonvpn"
10AUTH_FILE="$VPN_PATH/protonvpn_auth.txt"
11
12if [ "$EUID" -ne 0 ] ; then
13   echo "Please run $0 with root permissions"
14   exit 1
15fi
16
17# Get exit node country and index parameters and assmebly openvpn configuration name.
18ctry=$(echo $1 | tr -d "0-9")
19cfg=$(echo $1 | tr -d -c "[0-9]")
20VPN="${VPN_PATH}/${ctry}-free-${cfg}.protonvpn.udp.ovpn"
21if [ ! -e $VPN ] ; then
22   echo "VPN configuration file $1 does not exist"
23   exit 2
24fi
25
26CMD=$2
27
28echo "VPN: $VPN"
29
30# Start up protonvpn via openvpn
31start() {
32
33      # disable ipv6
34      /sbin/sysctl -w net.ipv6.conf.all.disable_ipv6=1
35      /sbin/sysctl -w net.ipv6.conf.default.disable_ipv6=1
36      /sbin/sysctl -w net.ipv6.conf.lo.disable_ipv6=1
37
38      echo -e "${GREEN}Launching $VPN...${NC}"
39      openvpn --config $VPN --auth-user-pass $AUTH_FILE --auth-nocache --mute-replay-warnings & >/dev/null 2>&1
40      RETVAL=$?
41      echo
42      return $RETVAL
43}
44
45# Make it stop!
46stop() {
47      echo -e "${GREEN}Stopping $VPN...${NC}"
48      pid=$(ps -A | grep openvpn | awk '{ print $1 }')
49      kill $pid > /dev/null 2>&1
50      RETVAL=$?
51      echo
52      /sbin/sysctl -w net.ipv6.conf.all.disable_ipv6=0
53      /sbin/sysctl -w net.ipv6.conf.default.disable_ipv6=0
54      /sbin/sysctl -w net.ipv6.conf.lo.disable_ipv6=0
55
56      echo
57      return $RETVAL
58}
59status() {
60      sz=$(/sbin/ifconfig | wc -l)
61      cz=$(/sbin/ifconfig | grep -n tun0 | cut -f1 -d":")
62      if [ -z $cz ] ; then cz=$sz; fi
63      lst=$(expr $sz \- $cz + 1)
64      ifconfig | tail -$lst
65}
66
67case "$CMD" in
68      start)
69          start
70          echo $RETVAL
71          ;;
72      stop)
73          stop
74          if [ $RETVAL ]; then
75            echo -e "Stopped ${GREEN}OK${NC}"
76          else
77            echo -e "Stopped: ${GREEN}Failed${NC}"
78          fi
79          ;;
80      restart)
81          stop
82          sleep 2
83          start
84          ;;
85      status)
86          status
87         ;;
88      *)
89        echo "Usage: bash $0 jp#|nl#|us# start|stop|status|restart"
90        exit 1
91esac
Simply open a command shell and login in as root. Then provide the script with the .ovpn country:
 1root@frodo:~# cd network
 2root@frodo:~/network# ./protonvpn.sh us1 start
 3VPN: /root/network/protonvpn/us-free-1.protonvpn.udp.ovpn
 4net.ipv6.conf.all.disable_ipv6 = 1
 5net.ipv6.conf.default.disable_ipv6 = 1
 6net.ipv6.conf.lo.disable_ipv6 = 1
 7Launching /root/network/protonvpn/us-free-1.protonvpn.udp.ovpn...
 8
 90
10root@frodo:~/network# 2025-03-21 18:59:17 OpenVPN 2.5.5 x86_64-slackware-linux-gnu [SSL (OpenSSL)] [LZO] [LZ4] [EPOLL] [MH/PKTINFO] [AEAD] built on Dec 15 2021
112025-03-21 18:59:17 library versions: OpenSSL 1.1.1zb  16 Oct 2024, LZO 2.10
122025-03-21 18:59:17 NOTE: the current --script-security setting may allow this configuration to call user-defined scripts
132025-03-21 18:59:17 TCP/UDP: Preserving recently used remote address: [AF_INET]146.70.230.146:80
142025-03-21 18:59:17 UDP link local: (not bound)
152025-03-21 18:59:17 UDP link remote: [AF_INET]146.70.230.146:80
162025-03-21 18:59:17 WARNING: 'link-mtu' is used inconsistently, local='link-mtu 1549', remote='link-mtu 1541'
172025-03-21 18:59:17 WARNING: 'auth' is used inconsistently, local='auth [null-digest]', remote='auth SHA1'
182025-03-21 18:59:17 WARNING: 'keysize' is used inconsistently, local='keysize 256', remote='keysize 128'
192025-03-21 18:59:17 [node-us-293.protonvpn.net] Peer Connection Initiated with [AF_INET]146.70.230.146:80
202025-03-21 18:59:19 NOTE: setsockopt TCP_NODELAY=1 failed
212025-03-21 18:59:19 TUN/TAP device tun0 opened
222025-03-21 18:59:19 /usr/sbin/ip link set dev tun0 up mtu 1500
232025-03-21 18:59:19 /usr/sbin/ip link set dev tun0 up
242025-03-21 18:59:19 /usr/sbin/ip addr add dev tun0 10.96.0.53/16
252025-03-21 18:59:19 /etc/openvpn/update-resolv-conf tun0 1500 1624 10.96.0.53 255.255.0.0 init
26dhcp-option DNS 10.96.0.1
272025-03-21 18:59:19 Initialization Sequence Completed
28
29root@frodo:~/network# ./protonvpn.sh us1 status
30VPN: /root/network/protonvpn/us-free-1.protonvpn.udp.ovpn
31tun0: flags=4305<UP,POINTOPOINT,RUNNING,NOARP,MULTICAST>  mtu 1500
32        inet 10.96.0.53  netmask 255.255.0.0  destination 10.96.0.53
33        unspec 00-00-00-00-00-00-00-00-00-00-00-00-00-00-00-00  txqueuelen 500  (UNSPEC)
34        RX packets 0  bytes 0 (0.0 B)
35        RX errors 0  dropped 0  overruns 0  frame 0
36        TX packets 0  bytes 0 (0.0 B)
37        TX errors 0  dropped 0 overruns 0  carrier 0  collisions 0
38
39wlan0: flags=4163<UP,BROADCAST,RUNNING,MULTICAST>  mtu 1500
40        inet 192.168.1.223  netmask 255.255.255.0  broadcast 192.168.1.255
41        ether 00:1e:52:7e:e5:1d  txqueuelen 1000  (Ethernet)
42        RX packets 406210  bytes 476574687 (454.4 MiB)
43        RX errors 0  dropped 0  overruns 0  frame 0
44        TX packets 137286  bytes 13136167 (12.5 MiB)
45        TX errors 0  dropped 0 overruns 0  carrier 0  collisions 0
46
47root@frodo:~/network# ./protonvpn.sh us1 stop
48VPN: /root/network/protonvpn/us-free-1.protonvpn.udp.ovpn
49Stopping /root/network/protonvpn/us-free-1.protonvpn.udp.ovpn...
50
512025-03-21 19:04:32 event_wait : Interrupted system call (code=4)
522025-03-21 19:04:32 SIGTERM received, sending exit notification to peer
53net.ipv6.conf.all.disable_ipv6 = 0
54net.ipv6.conf.default.disable_ipv6 = 0
55net.ipv6.conf.lo.disable_ipv6 = 0
56
57Stopped OK
58root@frodo:~/network# 2025-03-21 19:04:33 /usr/sbin/ip addr del dev tun0 10.96.0.53/16
592025-03-21 19:04:33 /etc/openvpn/update-resolv-conf tun0 1500 1624 10.96.0.53 255.255.0.0 init
602025-03-21 19:04:33 SIGTERM[soft,exit-with-notification] received, process exiting
Comments and suggestions are welcome: kingbeowulf@linuxgalaxy.org
Slackware64 iMac 2007 Redux
Posted on Sep 14, 2024 by kingbeowulf
A year ago, I refurbished a vintage 2007 iMac: 1TB SSD and new(-ish) power supply and it has been working pretty good for the most part.
Installing Slackware64-15.0 on an iMac 2007
Two issue still remain: Bluetooth (BT) and a tendency for the power supply over heat. I still haven't found a solution yet to the BT driver; this will wait for the next Slackware stable release "when it's ready; real soon now."
The mid 2007 iMac did have a tendency to overheat. Having poked around inside, there just isn't enough air flow to cool the power supply which can run extra hot under load. We can adjust the fan speed manually as root, once you figure out which fan cools both the CPU and the power supply. For example:
1# echo 1 > /sys/class/hwmon/hwmon3/device/fan3_manual
2# echo 1500 > /sys/class/hwmon/hwmon3/device/fan3_output
3# echo 2000 > /sys/class/hwmon/hwmon3/device/fan3_output
I was about to cobble something together when I stumbled across a great little daemon to do it all for me. So, why reinvent the wheel?
mbpfan: Adjust fan speed using the applesmc module
mbpfan is a great, simple program to tweak the fan curves when running Linux an a macbook or an iMac.
https://github.com/linux-on-mac/mbpfan
For Slackware (there are other distros?), you can build a nice installable package,
http://slackbuilds.org/repository/15.0/system/mbpfan/?search=mbpfan
For example, to run mbpfan at system boot, add it to /etc/rc.d/rc.local
1# mbpfan daemon to keep power supply from over heating (iMac 2007)
2# see /etc/mbpfan.conf
3/usr/sbin/mbpfan
Then edit /etc/mbpfan.conf as needed:
1in_fan3_speed = 1500
2max_fan3_speed = 3300
3
4# temperature units in celcius
5low_temp = 50			# if temperature is below this, fans will run at minimum speed
6high_temp = 60			# if temperature is above this, fan speed will gradually increase
7max_temp = 75			# if temperature is above this, fans will run at maximum speed
8polling_interval = 1	        # default is 1 seconds
You may need to experiment a bit for your particular Mac.
Have fun!
- Related Topics:
- slackware
- imac
- slackware64
- temperature
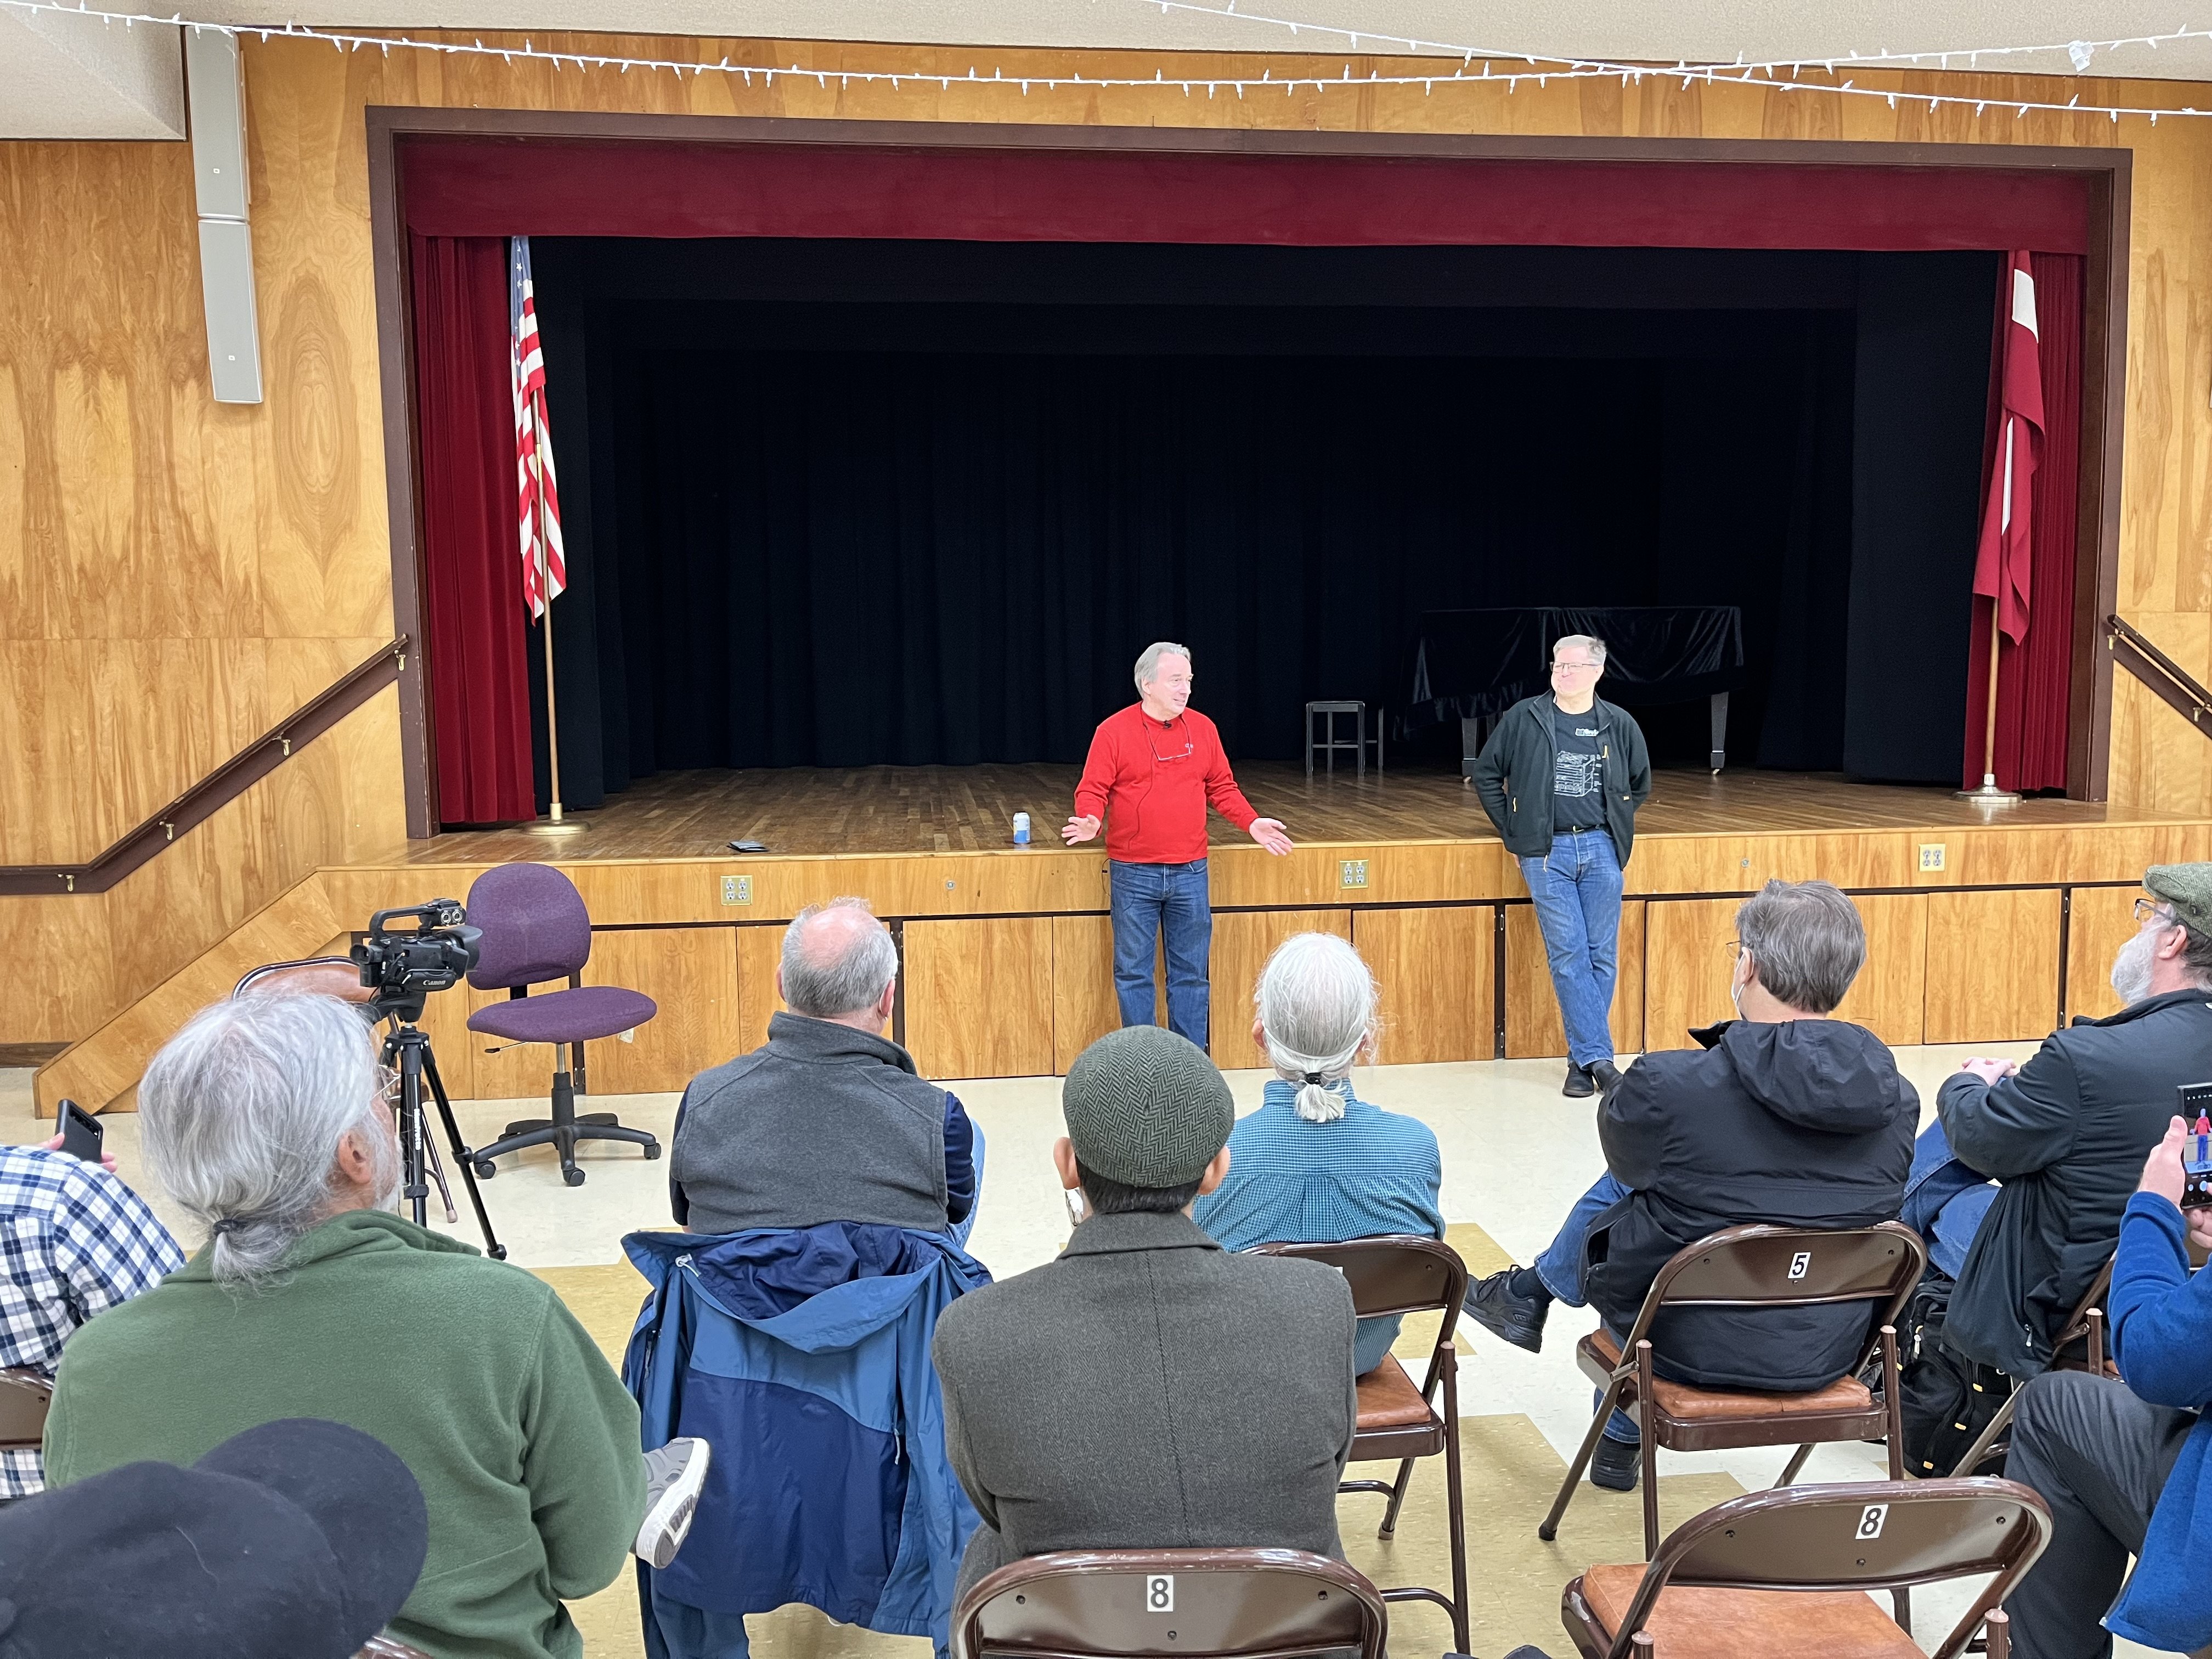
Portland Linux/Unix Group April 2024 Meeting
Posted on Apr 05, 2024 by kingbeowulf
Yesterday was the 30th Anniversary Meeting of Portland Linux/Unix Group - one of the oldest LUGs still in progress. Not only did we have cake,
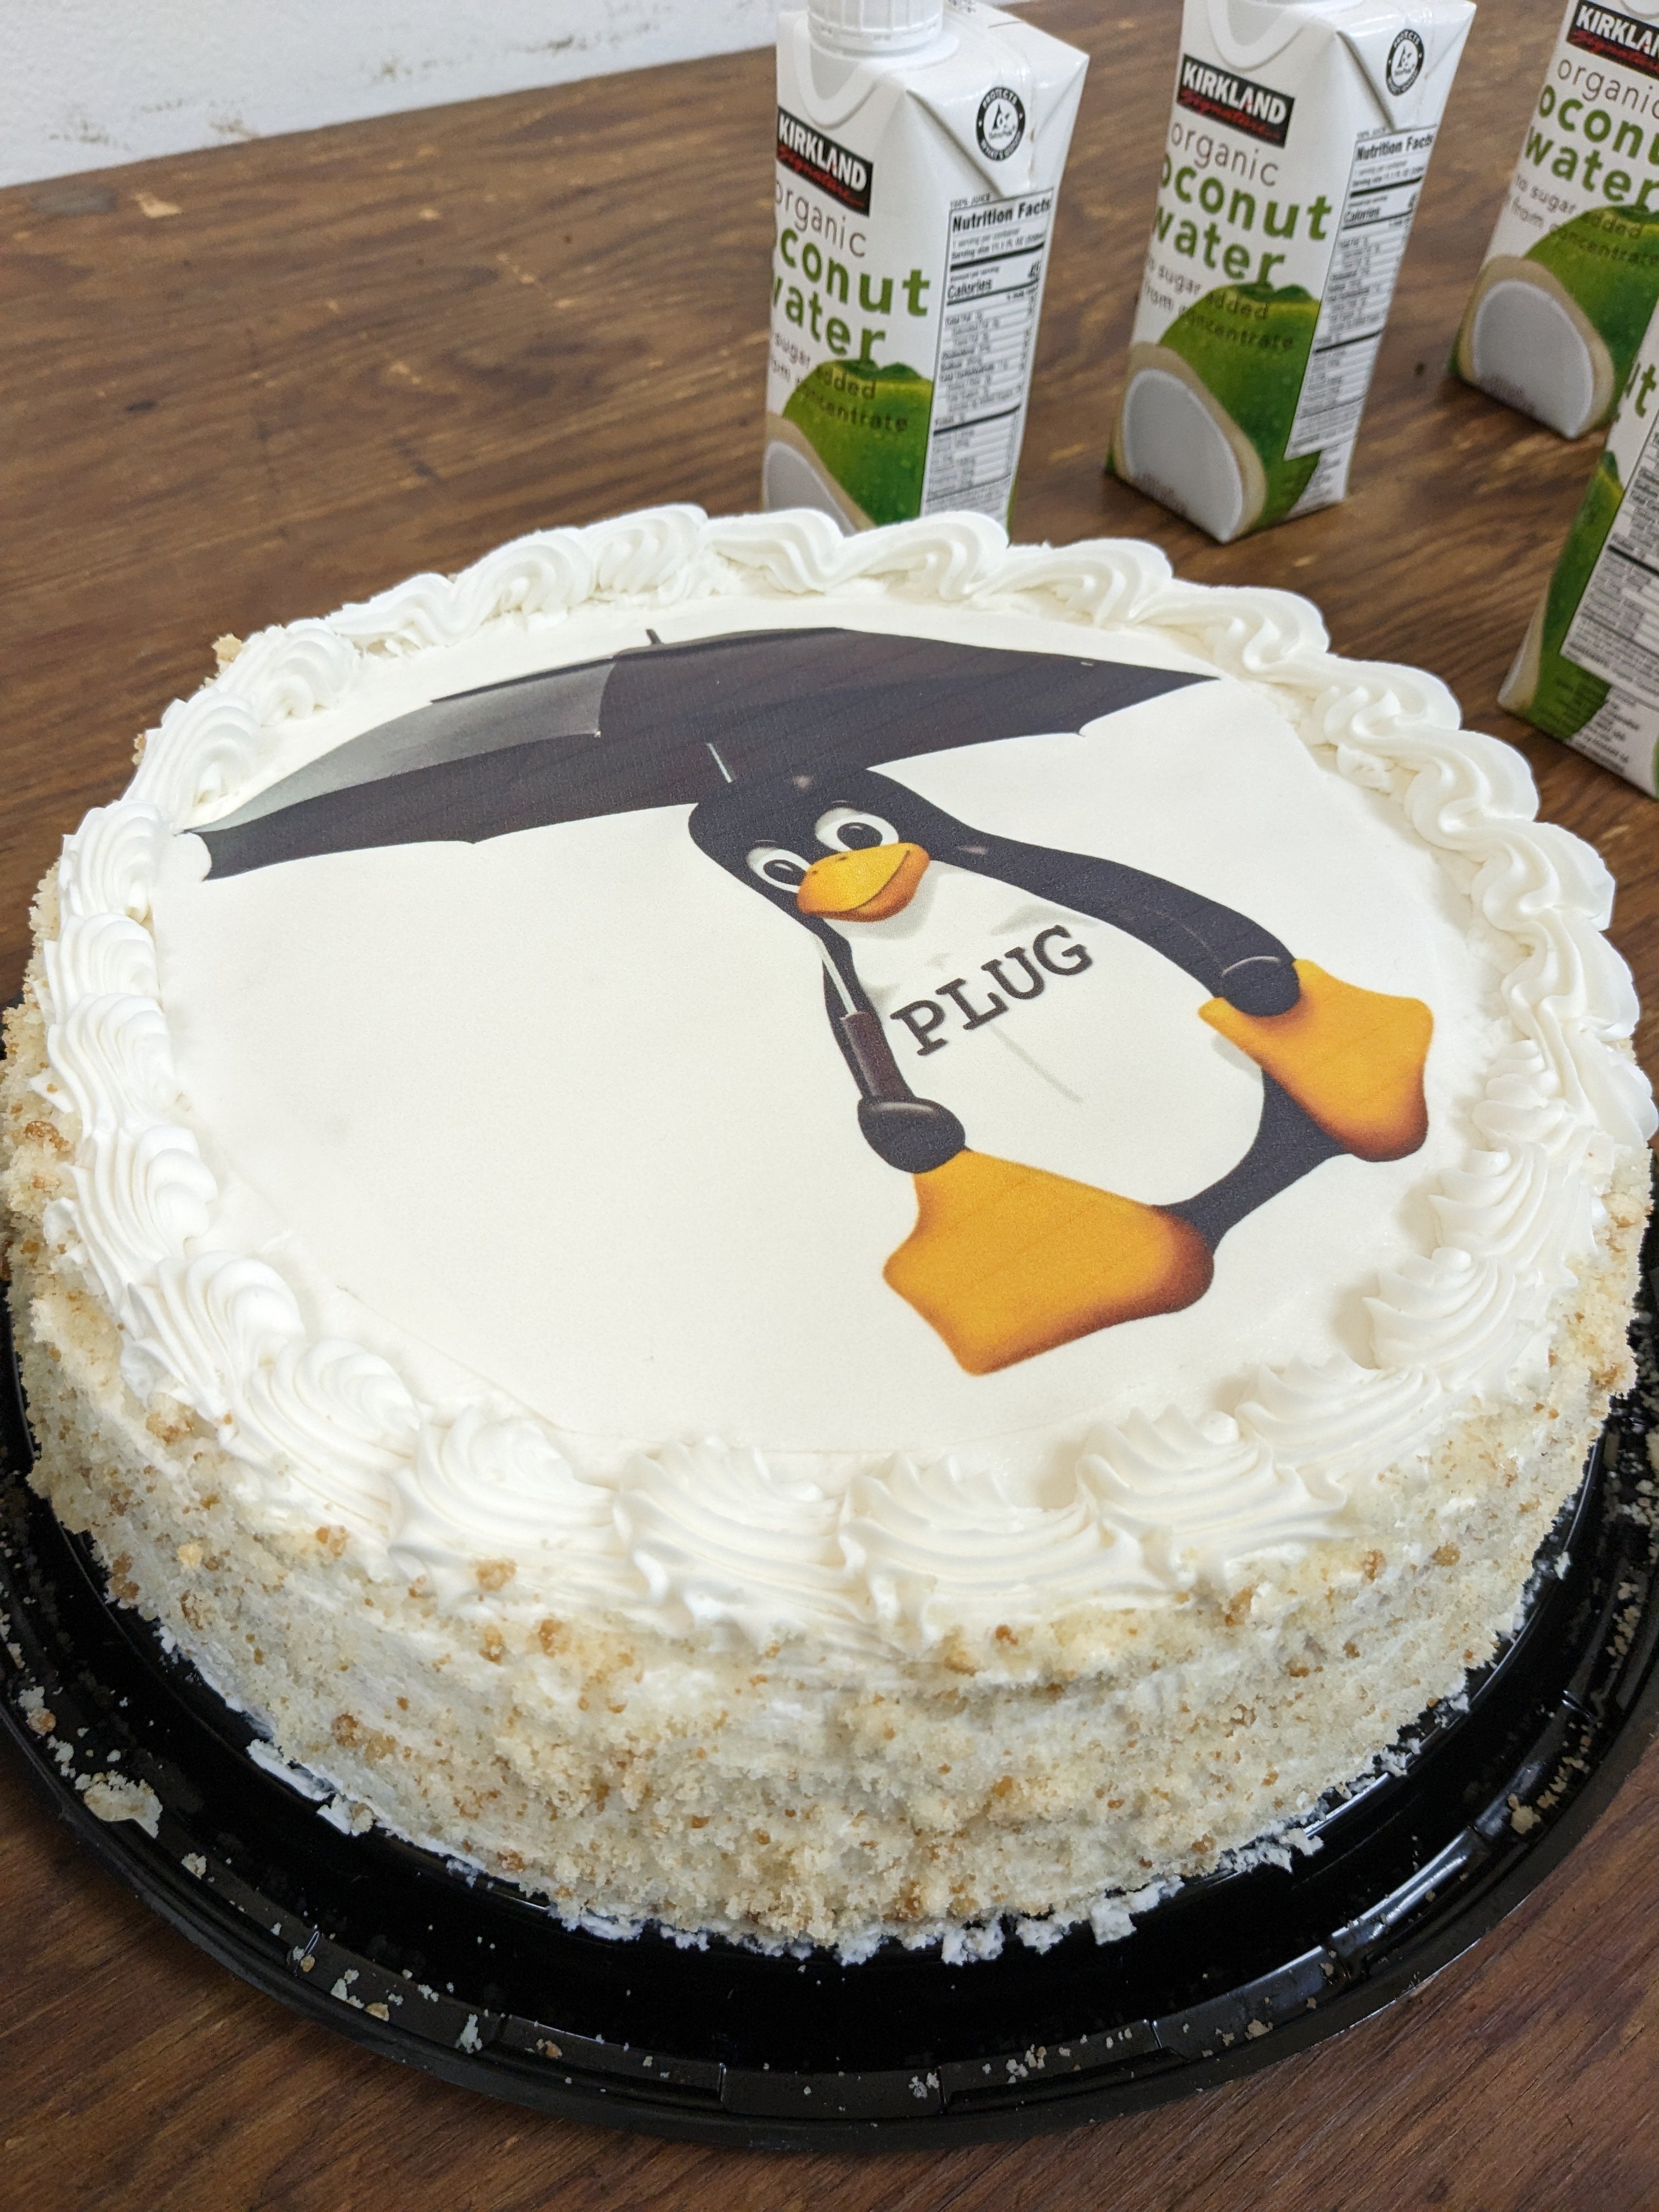
We also had a special guest speaker: Linus Torvalds.
We had a lively discussion of the history and future, and development process, of the Linux kernel, as well as a few random topics.
ROCm OpenCL Runtime for Slackware64
Posted on Mar 04, 2024 by kingbeowulf
A while ago, I had started beating on the ROCm build system to try to get a "simple" set of packages for those of us that only need basic OpenCL runtime support on Slackware64. AMD's ROCm includes that but also includes various tools to build HIP and OpenCL GPU compute programs. My prior efforts were the legacy OpenCL binary Ubuntu packages which wasn't very stable due to being compiled on Ubuntu. I had to take a pause due to a few health issues and only recently started looking into this again.
Recently, a post on the Slackbuilds.org mailing list completed what I could not: a set of slackbuild scripts for ROCm-5.5.1
https://github.com/414n/slackbuilds.org/blob/rocm-5.5.1
A big thanks to 414n to sift through and sort all the various ROCm bits and pieces. Much appreciated!
Now that I had a set of build scripts, and nice READMEs for which one does what and a workable build order, I dug up my notes to see which packages are needed to have OpenCL runtime support. AMD sure did not make this easy on package maintainers!
To start, grab a few packages from Slackbuilds.org that are external dependencies:
For rocminfo: numactl
For rocblas (optional package):
python3-wheel
msgpack-c
python3-virtualenv
For rocsolver (optional package):
fmt
Optional (utility):
clinfo
(or use the one provided with ROCm)
Before you build any of these packages, take note of the information and build order below. Rocblas and rocsolver are not required for the OpenCL runtime.
As I mentioned, I sifted through the packages to get a better idea of the build order for ROCm. What follows is the result.
B = build time dependency only
R = OpenCL runtime dependency
U = ROCm/OpenCL utility
The compile/build order in each Build stanza is optional.
Build 1st
rocm-llvm (B)
hsakmt-roct (R)
rocm-cmake (B)
python3-cppheaderparser (B) - included in 414n's git repository ROCm branch.
Build 2nd
rocm-device-libs (R)
Build 3rd
rocm-compiler-support (R)
hsa-roc (R)
build 4th
rocminfo (U)
rocm-smi-lib (U)
rocm-opencl-runtime (R)
The remaining packages are optional and are not required for basic OpenCL support. This includes the HIP runtime and various headers and libraries to build HIP and OpenCL programs.
Build 5th - Optional
rocm-clang-ocl [deprecated Dec 2023 for newer ROCm] (B)
hip-runtime-amd (B,R)
hsa-amd-aqlprofile-bin (optional, binary blob).
A code profiling/analysis binary blob library that is needed only for development and to suppress silly library missing errors.
Build 6th - Optional
in approximate build order
rocrand
rocblas
rocm-core
rocprim
hipcub
rocsparse
hipsparse
rocsolver
hipblas
composable-kernel
half - included in 414n's git repository ROCm branch.
miopengemm
miopen-hip
rocfft
hipfft
rocthrust
hipsolver
hipify-clang
rccl
roctracer
Once the the packages are built, which ones are necessary for just the OpenCL runtime? For basic ROCm OpenCL support:
numactl (for rocminfo)
hsa-rocr
hsakmt-roct
rocm-compiler-support
rocm-device-libs
rocm-opencl-runtime
rocm-smi-librocminfo
That's it!
The following utilities are provided in /opt/rocm/bin that provide
clinfo - OpenCL platform information
rocminfo - ROCm HSA agent information
rocm-smi - GPU status and control
The OpenCL ICD loader may have difficulty locating the correct OpenCL ICD and therefore the correct OpenCL library locations. If this happens (for example BOINC), either move or rename
etc/OpenCL/vendors/mesa.icd
So far, OpenCL works for BOINC and phoronix-test-suite with benchmarks hashcat and clpeak.
- Related Topics:
- OpenCL
- ROCm
- slackware64
- AMD GPU
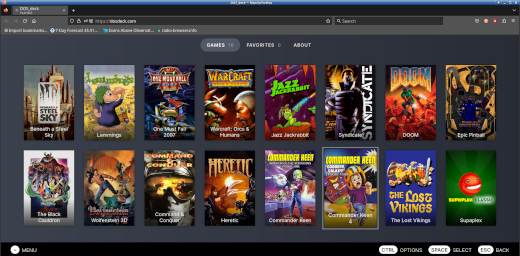
DOS_deck: Free, old-timey DOS games in a web browser
Posted on Nov 28, 2023 by kingbeowulf
I ran across an article in Ars Technica [1] about nifty project DOS_Deck [2] - a cross platform implementation of old DOS in a web browser. DOS_Deck simplifies the process of getting an old DOS game running. No more fiddling; just click and play.
Personally, I've always enjoyed the hours tweaking my old MSDOS configurations, and later, DOSBox on Linux, to get my games running. Although, I do recognize that some may feel that is an exercise in frustration.
They plan to add more examples from the vintage era of gaming.
[1]
[2]
Installing Slackware64-15.0 on an iMac 2007
Posted on Aug 20, 2023 by kingbeowulf
Now that Apple has moved on to their own "Apple silicon", all Intel CPU based Mac computers are on live support - and Apple ready to pull the plug. No more MacOS updates of any kind, even for recent models, as has already happened for the older Mac models. Recall that this is the same process as when Apple transitioned from PowerPC to Intel CPUs.
Granted, Apple does tend to support their hardware a bit longer than the Windows PC crowd, but it is still a shame to have to toss still perfectly good hardware. This post will describe how to breathe new life into a vintage 2007 iMac.
Apple long since pulled the plug on 2007 iMacs. After I replaced a dead power supply, I was perfectly happy with OS X El Capitan (10.11.6 2018) . This was the newest MacOS supported, but was also long past it's support date. Thus aluminum all-in-one is still a nice looking computing appliance, with a nice 24-inch 1920x1200 LCD screen. Full Specifications can be found here:
https://everymac.com/systems/apple/imac/specs/imac-core-2-duo-2.4-24-inch-aluminum-specs.html
This iMac already had been upgraded to 4GB DRAM, and after I replace the dead power supply, I swapped the old hard drive with a spare Samsung EVO 750 SSD.
A good place to start for instructions on how to crack open a Mac and for parts, check out ifixit. Recommended.
Both the standard Slackware installer DVD or USB drive will boot up. However, I recommend the Slackware Live Edition (currently version 1.70, "liveslak"). The install and setup is a bit easier.
https://download.liveslak.org/
Information and details about liveslak can be found here:
https://docs.slackware.com/slackware:liveslak
liveslak was developed by long time Slackware contributor Alien BOB. Recommended.
The liveslak I selected provides for KDE/Plasma and XFCE desktops. Editions with Cinnamon, Mate desktops, as well as a customized Digital Audio Workstation (DAW), are available. For the adventurous, the development branch, Slackware-Current, can be downloaded.
Please note: I am assuming you are familiar with the regular Slackware installation process. If you run into issues, I can provide some assistance. Post on Linuxquestions.org, email me, or see if I am active on IRC (#linuxgalaxy libera.chat)
Insert the live DVD or USB drive and power on the iMac. Hold the OPTION key (alt on non-Mac keyboards), until you here the boot chime. Eventually, a list of EFI boot devices will be available. You will see something similar to:
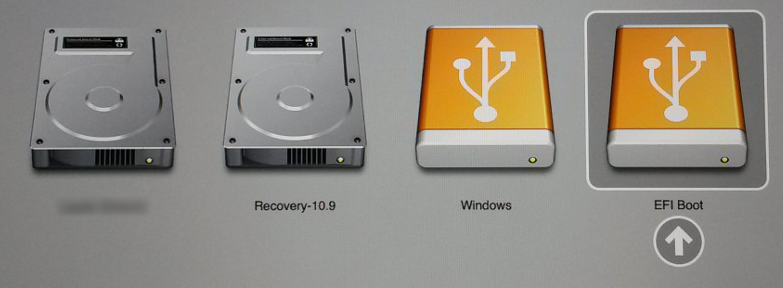
Select the EFI USB icon to boot the USB. The DVD version will be a DVD icon. Ignore the Windows icon if present - that is for hybrid media that can also boot via DOS/MBR.
After the boot process (and this may be a bit slow), log in with the "live" user with password "live". The root password is "root". To install, click the installation icon in the upper left corner and follow the instructions. if you logged in as "live", then provide sudo with the "live" password.
First, choose 'yes' to GPT partition your hard drive. I recommend something similar to the following (partition names are optional) with swap roughly twice the RAM:
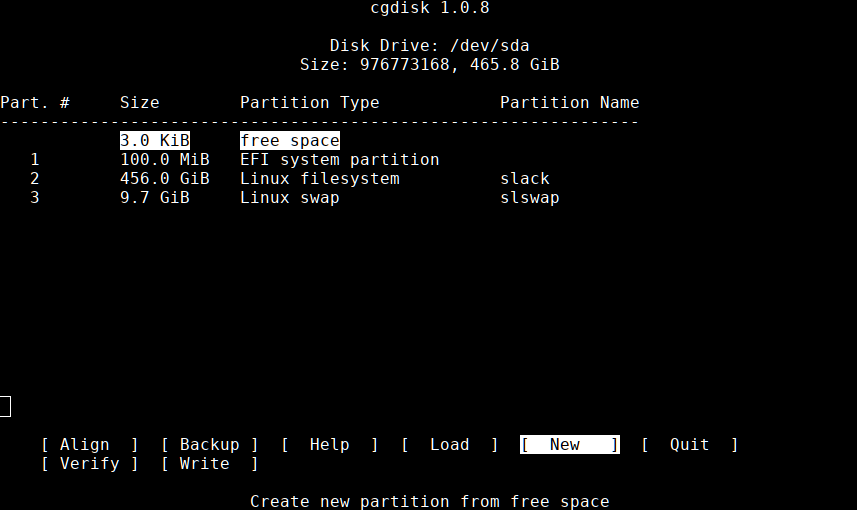
Save the new partitions and continue with the installation. When you get to the lilo/elilo install section, skip both. Neither work with Macs. Will set up grub instead later.
Once done the installer will exit and you will still be in the liveslak environment. Do not reboot yet! Now we need to set up a grub as the boot loader. Open a terminal and "su -" change to root if needed. Verify your partitions:
1# lsblk
2NAME   MAJ:MIN RM   SIZE RO TYPE MOUNTPOINTS
3sda      8:0    0 465.8G  0 disk
4├─sda1   8:1    0   100M  0 part /boot/efi
5├─sda2   8:2    0   456G  0 part /
6└─sda3   8:3    0   9.7G  0 part [SWAP]
Now wee need to chroot into the new Slackware installation. For details, refer to
https://docs.slackware.com/howtos:slackware_admin:how_to_chroot_from_media
1# mount /dev/sda2 /mnt
2# mount /dev/sda1 /mnt/efi
3# mount -o bind /dev /mnt/dev
4# mount -o bind /proc /mnt/proc
5# mount -o bind /sys /mnt/sys
6# chroot /mnt /bin/bash
Next, let's get this drive set up to but with grub. These instructions were adapted from
https://docs.slackware.com/howtos:slackware_admin:set_up_grub_as_boot_loader_on_uefi_based_hardware
1# grub-install --target=x86_64-efi --efi-directory=/boot/efi --bootloader-id=grub --recheck --debug
If you receive a message similar to "UEFI variables not supported on this machine," you will need to exit the chroot and mount the EFI variables:
1# mount --rbind /sys/firmware/efi/efivars /mnt/sys/firmware/efi/efivars/
Then hop back into the chroot and re-run the grub-install command. Once grub-install completes successfully, continue with
1# cp /usr/share/locale/en\@quot/LC_MESSAGES/grub.mo /boot/grub/locale/en.mo
2# grub-mkconfig -o /boot/grub/grub.cfg
Now, exit the chroot environment and reboot the iMac. Remember to remove the USB drive, etc.
Enjoy Slackware on your recycled iMac!
On the iMac 2007, everything worked out-of-the-box (so far!) except for wifi and bluetooth (BT). The wifi chipset is Broadcom BCM4321. The b43 kernel driver and needs the appropriate firmware which you can install via Slackbuilds.org
https://www.slackbuilds.org/repository/15.0/network/b43-firmware/
I haven't looked into what drivers are needed to get BT working yet. Stay tuned.
Older Macs may have a few issues booting due to corrupted SMC and PRAM.
- iMac powers on, fans and DVD spin up, but screen stays blank/blank. Reset SMC: hold power button for 15 seconds. On some Macs, hold down the Shift+Control+Option keys and the Power button at the same time. If that does not work, unplug the power cable for 10-15 minutes.
- iMac sound boot chime but screen stays gray. Try to reset SMC as above. If that does not work, reset PRAM: power off then on again. At the boot chime hold "Command+Option+P+R" keys until next boot chime (gray/chime - blank - gray/chime). If you get the flashing ? file folder icon after reboot or power cycle, boot into liveslak and repeat the grub-install/grub-mkconfig steps.
- Related Topics:
- imac
- slackware64
GPU Support Brackets?
Posted on Jul 19, 2023 by kingbeowulf
Given the size and weight of discreet GPU cards the past few years, GPU support brackets have become popular to prevent sag (tower cases with GPU mounted side-ways) and thus potential damage to the GPU and motherboard. Most current motherboards, say last 5 years os so, feature at least one reinforced PCI-express x16 slot for these heftier cards. GPU manufacturers also have balanced the card and trimmed the weight a bit as well. However, we often see recommendations to add a GPU support bracket to your new or existing build. Is this support required?
Generally, no. If you do see significant GPU sag, first check the end bracket connection and make sure the card is fully seated in the slot. Some larger cards can be a bit difficult to get snapped in correctly in a tight space.
Case in point: XFX Radeon RX 5700 XT THICC Ultra III
This is a massive card, heavy, and dwarfed my prior 900- and 1000-series Nvidia GPUs. It was a very tight fit in my large full tower Antec P100 case and seemed to wobble a bit. So I used a twist tie to provide a bit of lift.
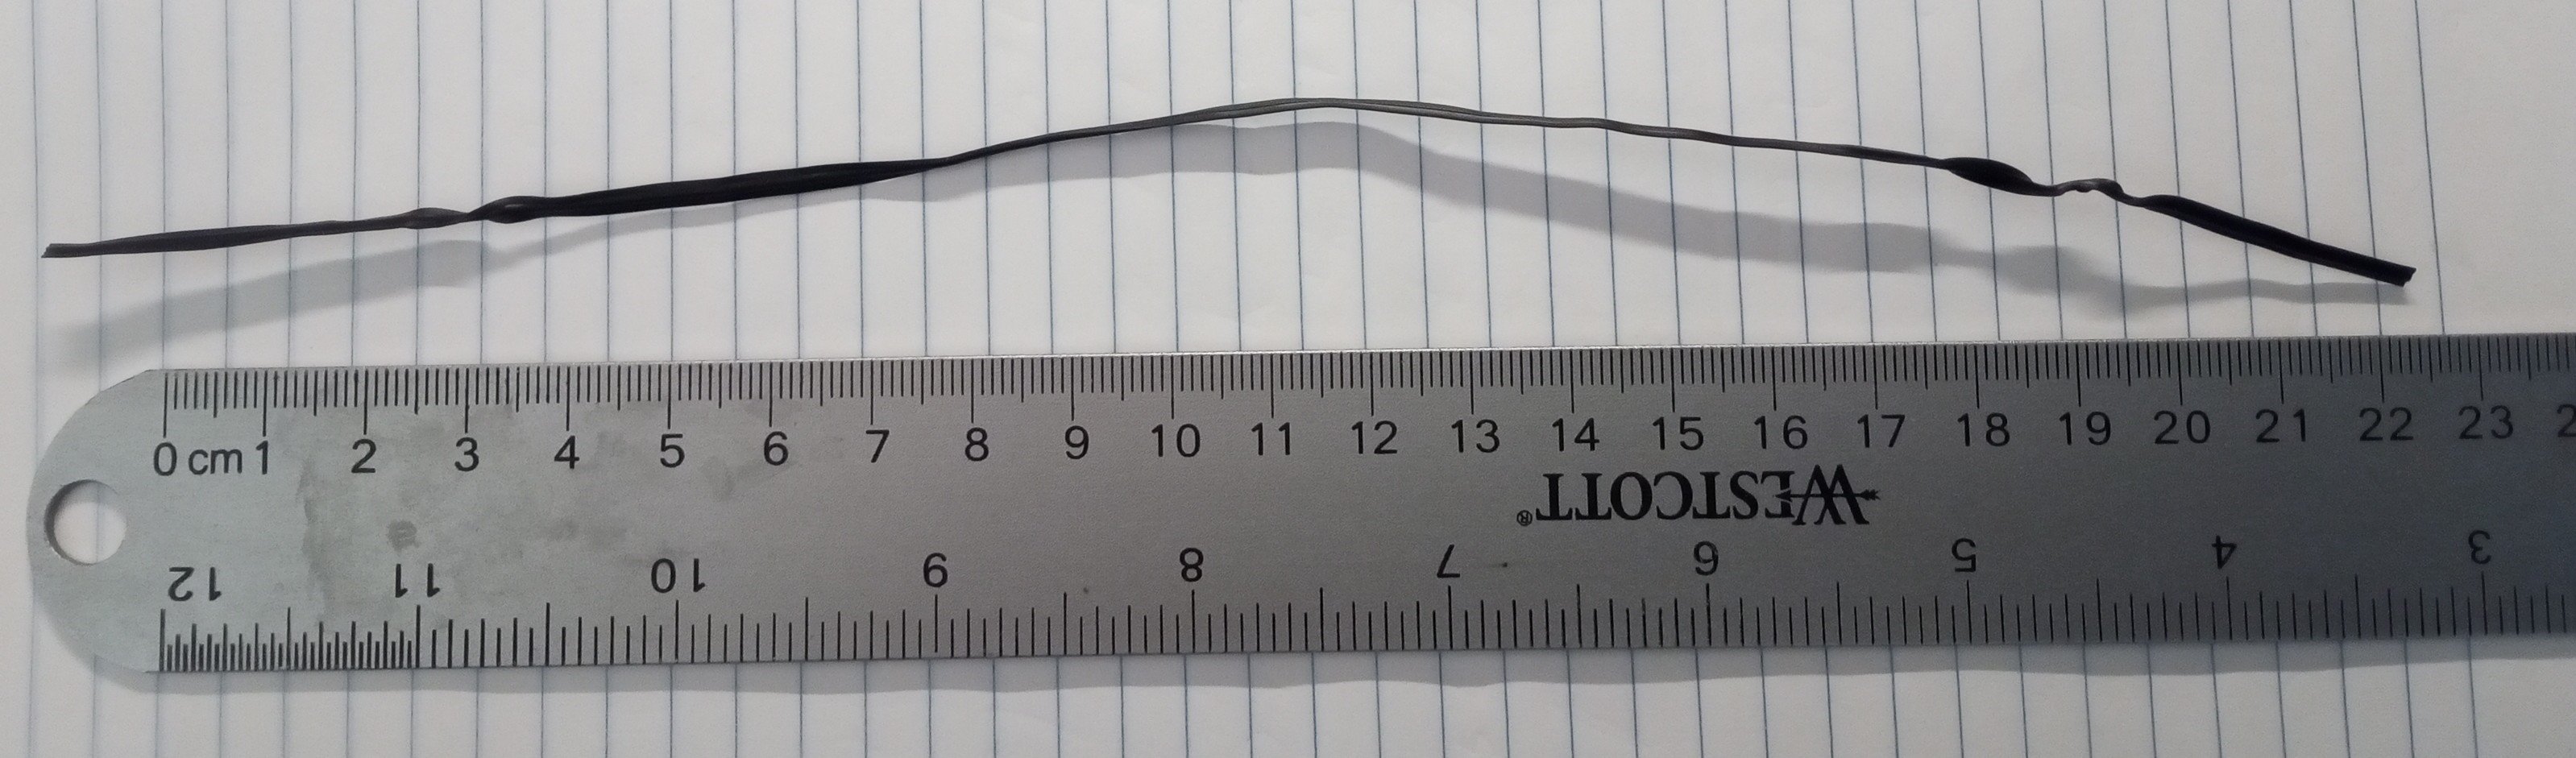
No need to spend money on some silly piece of plastic or metal.
The new Sapphire Pulse Radeon RX 6800 XT Gaming OC is quite a bit lighter, but I strung it up just in case!
Older posts
Contact:
- kingbeowulf@linuxgalaxy.org
- mumble.linuxgalaxy.org:64738
- Libera.chat IRC
- ##slackware, #slackbuilds, #linuxgalaxy
Screamin' and a-streamin' !
- https://twitch.tv/kngbwlf
- https://www.youtube.com/@mylinuxgalaxy
Advertisement
Tired of Steam, Epic and other rip-off game "stores"? Check out Humble Bundle for your digital download needs! A portion of your hard-earned gaming cash goes to charity.
King Beowulf's Humble Bundle Referral CodeCitizen Science!

