Installing Slackware64-15.0 on an iMac 2007
Posted on Aug 20, 2023 by kingbeowulf
Now that Apple has moved on to their own "Apple silicon", all Intel CPU based Mac computers are on live support - and Apple ready to pull the plug. No more MacOS updates of any kind, even for recent models, as has already happened for the older Mac models. Recall that this is the same process as when Apple transitioned from PowerPC to Intel CPUs.
Granted, Apple does tend to support their hardware a bit longer than the Windows PC crowd, but it is still a shame to have to toss still perfectly good hardware. This post will describe how to breathe new life into a vintage 2007 iMac.
Apple long since pulled the plug on 2007 iMacs. After I replaced a dead power supply, I was perfectly happy with OS X El Capitan (10.11.6 2018) . This was the newest MacOS supported, but was also long past it's support date. Thus aluminum all-in-one is still a nice looking computing appliance, with a nice 24-inch 1920x1200 LCD screen. Full Specifications can be found here:
https://everymac.com/systems/apple/imac/specs/imac-core-2-duo-2.4-24-inch-aluminum-specs.html
This iMac already had been upgraded to 4GB DRAM, and after I replace the dead power supply, I swapped the old hard drive with a spare Samsung EVO 750 SSD.
A good place to start for instructions on how to crack open a Mac and for parts, check out ifixit. Recommended.
Both the standard Slackware installer DVD or USB drive will boot up. However, I recommend the Slackware Live Edition (currently version 1.70, "liveslak"). The install and setup is a bit easier.
https://download.liveslak.org/
Information and details about liveslak can be found here:
https://docs.slackware.com/slackware:liveslak
liveslak was developed by long time Slackware contributor Alien BOB. Recommended.
The liveslak I selected provides for KDE/Plasma and XFCE desktops. Editions with Cinnamon, Mate desktops, as well as a customized Digital Audio Workstation (DAW), are available. For the adventurous, the development branch, Slackware-Current, can be downloaded.
Please note: I am assuming you are familiar with the regular Slackware installation process. If you run into issues, I can provide some assistance. Post on Linuxquestions.org, email me, or see if I am active on IRC (#linuxgalaxy libera.chat)
Insert the live DVD or USB drive and power on the iMac. Hold the OPTION key (alt on non-Mac keyboards), until you here the boot chime. Eventually, a list of EFI boot devices will be available. You will see something similar to:
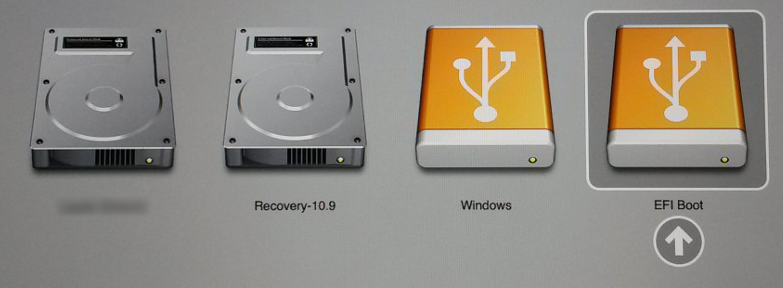
Select the EFI USB icon to boot the USB. The DVD version will be a DVD icon. Ignore the Windows icon if present - that is for hybrid media that can also boot via DOS/MBR.
After the boot process (and this may be a bit slow), log in with the "live" user with password "live". The root password is "root". To install, click the installation icon in the upper left corner and follow the instructions. if you logged in as "live", then provide sudo with the "live" password.
First, choose 'yes' to GPT partition your hard drive. I recommend something similar to the following (partition names are optional) with swap roughly twice the RAM:
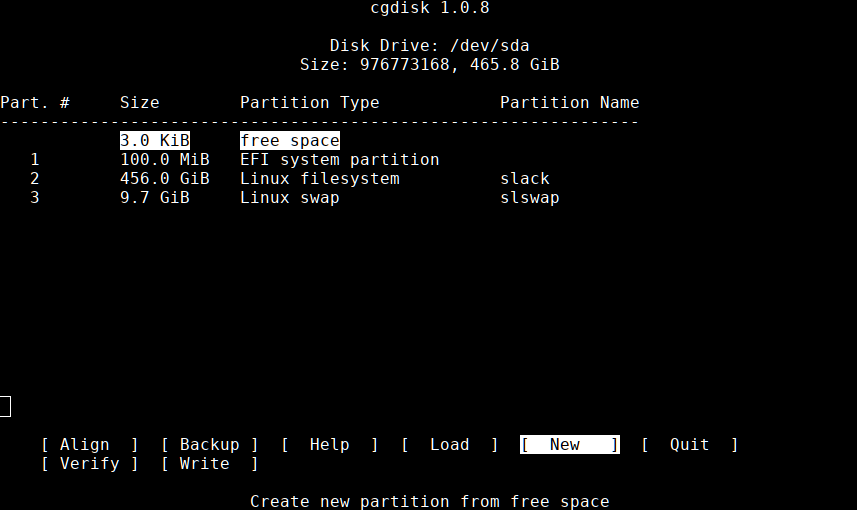
Save the new partitions and continue with the installation. When you get to the lilo/elilo install section, skip both. Neither work with Macs. Will set up grub instead later.
Once done the installer will exit and you will still be in the liveslak environment. Do not reboot yet! Now we need to set up a grub as the boot loader. Open a terminal and "su -" change to root if needed. Verify your partitions:
1# lsblk
2NAME   MAJ:MIN RM   SIZE RO TYPE MOUNTPOINTS
3sda      8:0    0 465.8G  0 disk
4├─sda1   8:1    0   100M  0 part /boot/efi
5├─sda2   8:2    0   456G  0 part /
6└─sda3   8:3    0   9.7G  0 part [SWAP]
Now wee need to chroot into the new Slackware installation. For details, refer to
https://docs.slackware.com/howtos:slackware_admin:how_to_chroot_from_media
1# mount /dev/sda2 /mnt
2# mount /dev/sda1 /mnt/efi
3# mount -o bind /dev /mnt/dev
4# mount -o bind /proc /mnt/proc
5# mount -o bind /sys /mnt/sys
6# chroot /mnt /bin/bash
Next, let's get this drive set up to but with grub. These instructions were adapted from
https://docs.slackware.com/howtos:slackware_admin:set_up_grub_as_boot_loader_on_uefi_based_hardware
1# grub-install --target=x86_64-efi --efi-directory=/boot/efi --bootloader-id=grub --recheck --debug
If you receive a message similar to "UEFI variables not supported on this machine," you will need to exit the chroot and mount the EFI variables:
1# mount --rbind /sys/firmware/efi/efivars /mnt/sys/firmware/efi/efivars/
Then hop back into the chroot and re-run the grub-install command. Once grub-install completes successfully, continue with
1# cp /usr/share/locale/en\@quot/LC_MESSAGES/grub.mo /boot/grub/locale/en.mo
2# grub-mkconfig -o /boot/grub/grub.cfg
Now, exit the chroot environment and reboot the iMac. Remember to remove the USB drive, etc.
Enjoy Slackware on your recycled iMac!
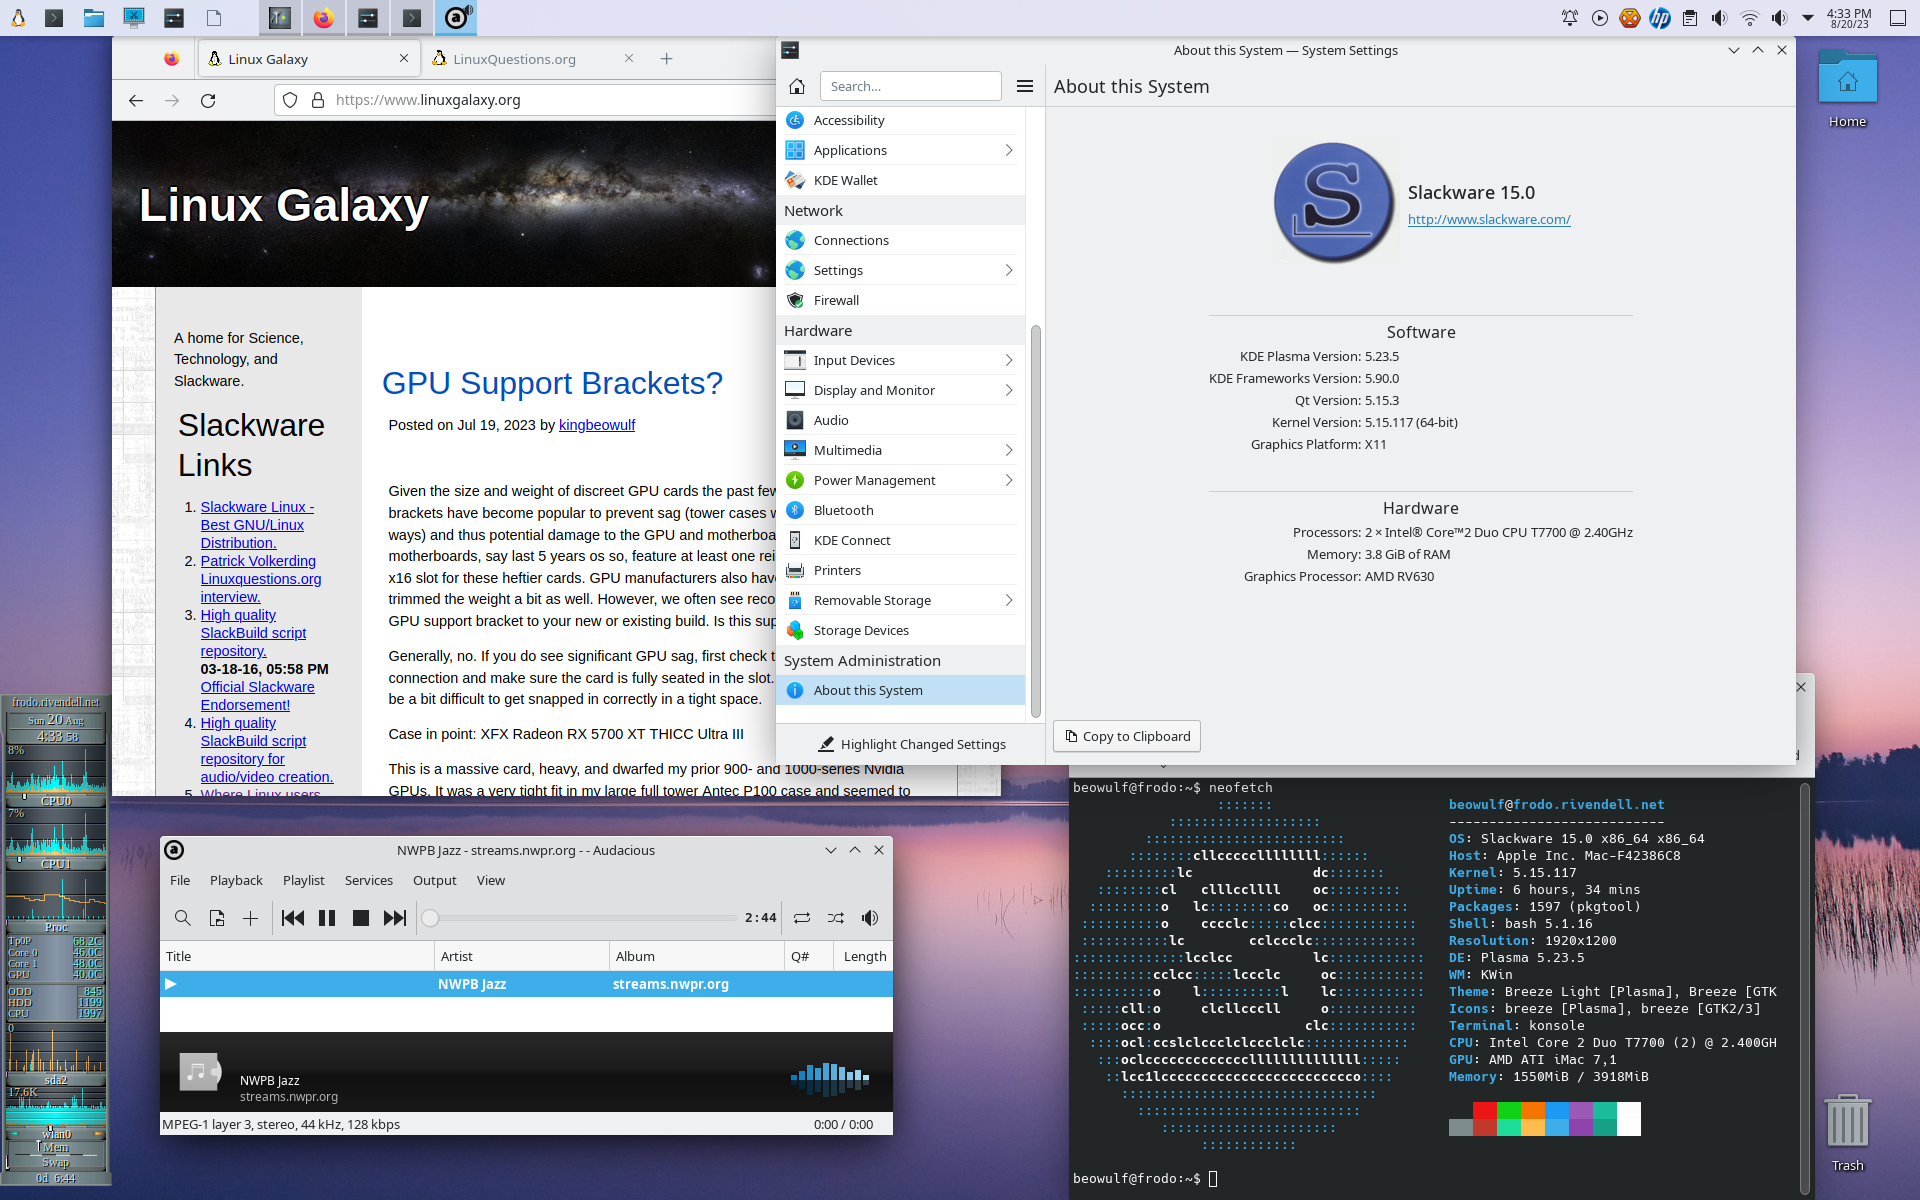
On the iMac 2007, everything worked out-of-the-box (so far!) except for wifi and bluetooth (BT). The wifi chipset is Broadcom BCM4321. The b43 kernel driver and needs the appropriate firmware which you can install via Slackbuilds.org
https://www.slackbuilds.org/repository/15.0/network/b43-firmware/
I haven't looked into what drivers are needed to get BT working yet. Stay tuned.
Older Macs may have a few issues booting due to corrupted SMC and PRAM.
- iMac powers on, fans and DVD spin up, but screen stays blank/blank. Reset SMC: hold power button for 15 seconds. On some Macs, hold down the Shift+Control+Option keys and the Power button at the same time. If that does not work, unplug the power cable for 10-15 minutes.
- iMac sound boot chime but screen stays gray. Try to reset SMC as above. If that does not work, reset PRAM: power off then on again. At the boot chime hold "Command+Option+P+R" keys until next boot chime (gray/chime - blank - gray/chime). If you get the flashing ? file folder icon after reboot or power cycle, boot into liveslak and repeat the grub-install/grub-mkconfig steps.
- Related Topics:
- imac
- slackware64
Contact:
- kingbeowulf@linuxgalaxy.org
- mumble.linuxgalaxy.org:64738
- Libera.chat IRC
- ##slackware, #slackbuilds, #linuxgalaxy
Screamin' and a-streamin' !
- https://twitch.tv/kngbwlf
- https://www.youtube.com/@mylinuxgalaxy
Advertisement
Tired of Steam, Epic and other rip-off game "stores"? Check out Humble Bundle for your digital download needs! A portion of your hard-earned gaming cash goes to charity.
King Beowulf's Humble Bundle Referral CodeCitizen Science!

